 Save to Pinterest
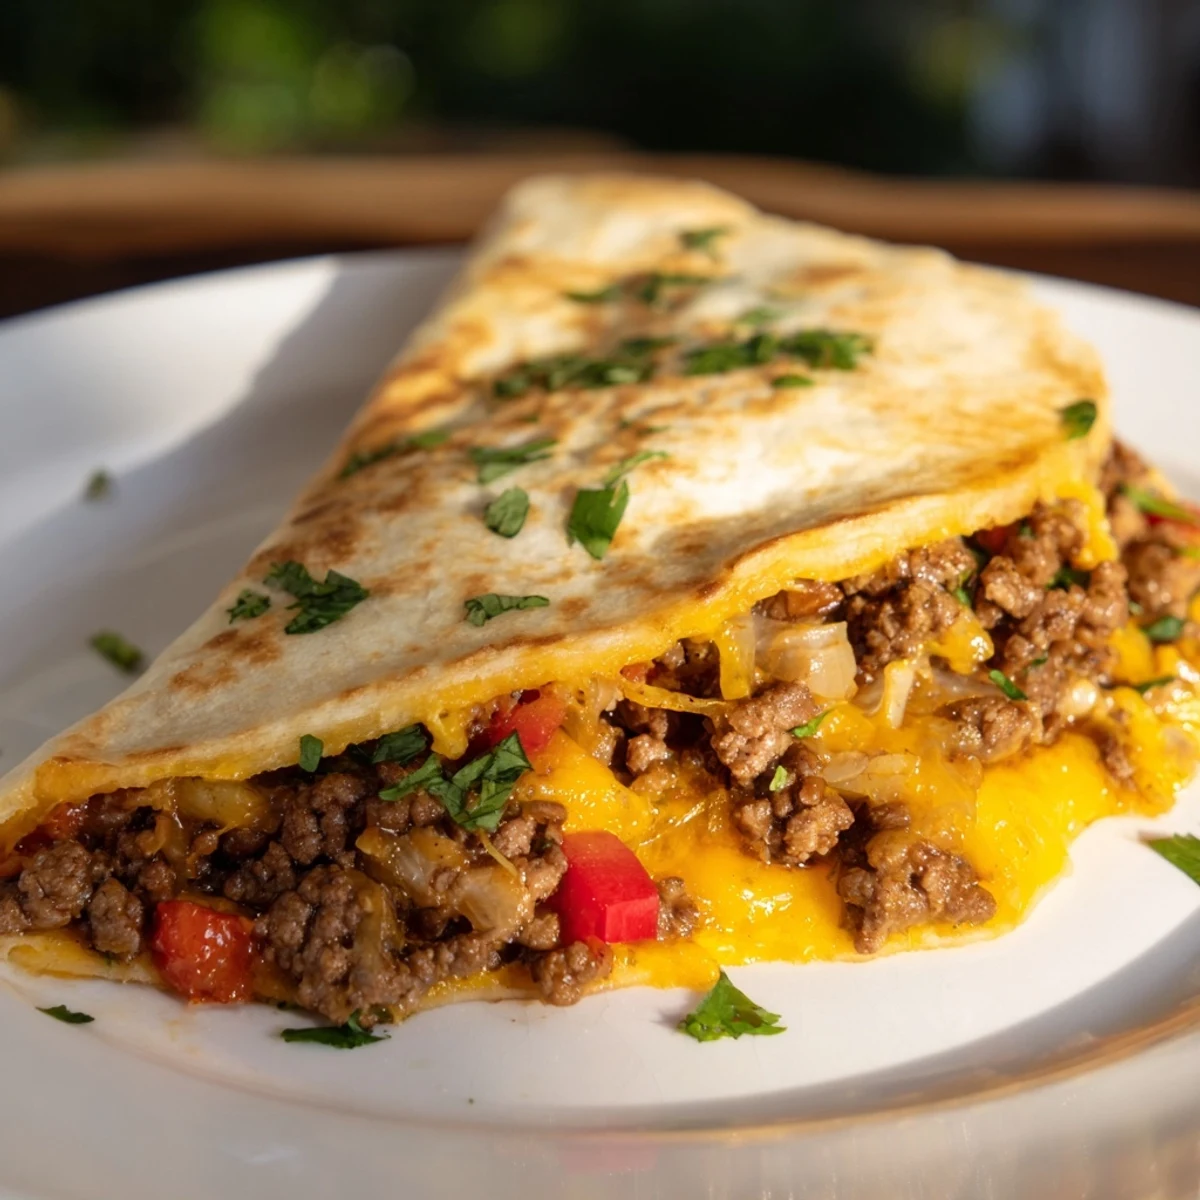
 This dish features seasoned ground beef combined with sautéed onions and bell peppers, layered with melty cheddar and Monterey Jack cheeses inside warm flour tortillas. Cooked until golden and crisp, these quesadillas offer a balanced blend of spices like cumin, chili powder, and smoked paprika, delivering rich and smoky flavors. Ideal for a quick lunch or snack, they can be served with sour cream, salsa, and guacamole for added zest. Variations include using turkey or chicken and adding jalapeños for extra heat.
I still remember the first time I made beef quesadillas for my roommate on a Friday night—we were broke, hungry, and had maybe thirty minutes before heading out. I opened the fridge and found ground beef, some tortillas, and a couple of blocks of cheese. Something clicked. I browned the beef with whatever spices I had on hand, melted cheese between two tortillas, and when that golden-brown crust formed in the skillet, I knew I'd stumbled onto something special. Now, years later, these quesadillas are my go-to when I want something that feels indulgent but comes together faster than delivery ever could.
I'll never forget making a batch of these for my sister's surprise birthday picnic. I was nervous cooking in someone else's tiny kitchen with unfamiliar equipment, but the moment I pulled those quesadillas off the griddle—crispy, bubbling with melted cheese—and sliced them into perfect wedges, everyone gathered around. No fancy plating needed. Just good food that brought people together in the simplest, most honest way.
Ingredients
- Olive oil: Just a tablespoon is all you need to build flavor in the beef and toast your peppers and onions. Don't skip this step—it's where the foundation of deliciousness begins.
- Ground beef: One pound feeds four people generously. Look for meat with a little fat content (80/20 is perfect) so your filling stays moist and flavorful.
- Onion and garlic: These are the aromatics that make your kitchen smell incredible and give the beef depth. Don't rush mincing the garlic—those few extra seconds matter.
- Red bell pepper: It adds sweetness, color, and a subtle crunch that makes each bite interesting. Dice it small so it cooks evenly with everything else.
- Cumin, chili powder, and smoked paprika: This trio is the soul of the filling. Together they whisper Mexican spices without shouting. Toast them briefly in the cooked beef for maximum impact.
- Salt and black pepper: Season as you go—taste the beef once it's cooked and adjust. This is where most home cooks hesitate, but trust your palate.
- Flour tortillas: Use large ones, and if they're a day or two old, they're actually easier to work with. Fresh tortillas sometimes tear, but older ones are more pliable.
- Cheddar and Monterey Jack cheese: The cheddar brings sharpness, the Monterey Jack melts like a dream. Together they create the perfect melty-stretchy moment. If you can, buy a block and shred it yourself—it melts better than pre-shredded.
- Fresh cilantro: Optional, but I always add it. It brightens everything and makes the quesadilla feel fresher and more finished.
- Sour cream, salsa, and guacamole: These are your finishing touches. They're not just toppings—they're the conversation starters, the flavors that make people go back for more.
Instructions
- Sauté your vegetables until they soften:
- Heat olive oil in a large skillet over medium heat. Add your chopped onion and red bell pepper, and let them cook undisturbed for the first minute so they get a little caramelized. Then stir and cook for another 1–2 minutes until they're tender and the kitchen smells amazing. This is the foundation—don't rush it.
- Wake up the garlic:
- Add your minced garlic and cook for just 30 seconds. You'll smell it the moment it's ready. If you cook it longer, it turns bitter, so timing is everything here.
- Brown the beef until it's cooked through:
- Increase the heat slightly and add your ground beef, breaking it apart with a wooden spoon as it hits the pan. You want small, evenly-browned pieces, not big chunks. This takes about 5–7 minutes. Once there's no pink left and the meat is deeply browned, drain any excess fat if there's a pool of it. Trust me on this—it makes a difference in the final texture.
- Season the filling and let it meld:
- Sprinkle in your cumin, chili powder, smoked paprika, salt, and black pepper. Stir everything together and cook for another 2 minutes so the spices really coat the beef and get fragrant. Taste a tiny bit and adjust—this is your chance to make it perfect. Then set it aside to cool slightly.
- Get your griddle or skillet ready:
- Use a clean, large skillet or griddle and heat it over medium heat. You want it hot enough that when you place a tortilla on it, it sizzles gently. Too cold and your quesadilla will be soft and greasy; too hot and the outside will burn before the cheese melts.
- Build your first quesadilla:
- Place one tortilla flat on the hot skillet. Sprinkle about ¼ cup each of cheddar and Monterey Jack cheese over it, covering most of the surface but leaving a small border. Spoon roughly ¼ of your beef filling evenly over the cheese—don't pile it all in one spot or it won't cook evenly. Add a small pinch of fresh cilantro if you're using it. Think of it like building a delicious sandwich, because that's exactly what this is.
- Top and cook until golden:
- Place another tortilla on top, pressing down gently. Let it cook undisturbed for 2–3 minutes. You'll see the bottom start to turn golden and hear a gentle sizzle. The cheese is melting underneath, bonding everything together. Don't peek too much—let it do its thing.
- Flip with confidence:
- Using a wide spatula, carefully slide it underneath the quesadilla, making sure it's fully supported. Take a breath, then flip it quickly and decisively. If you hesitate, it might break. The second side cooks faster—usually just 2 minutes until it's golden and crispy. The cheese should be fully melted now, and the whole thing should hold together beautifully.
- Repeat and serve:
- Transfer your finished quesadilla to a cutting board and repeat with the remaining tortillas and filling. Slice each quesadilla into four wedges and arrange them on a plate. Serve immediately while they're still warm and the cheese is at its stretchiest. Accompany with sour cream, salsa, and guacamole for dipping and topping.
 Save to Pinterest
 There was this one time I made quesadillas for my daughter's school potluck, and I watched a kid who "doesn't like spicy food" eat three wedges. His mom asked for the recipe. That's when I realized these aren't just quick dinners—they're the kind of simple, honest food that makes people happy and creates little memories around the table.
Making It Your Own
The beauty of quesadillas is how forgiving they are. If you want heat, slice jalapeños thin and add them to the filling or scatter them between the cheese layers. If you want to go lighter, ground turkey or chicken works beautifully—just season it the same way and don't let it dry out. Some nights I add sautéed mushrooms or caramelized onions for extra depth. Others, I'll use a mix of cheeses: pepper jack for spice, fresh mozzarella for creaminess, or crumbled queso fresco for brightness. The skeleton stays the same, but the flavors can shift depending on what you're craving or what's in your fridge.
Timing and Preparation
The whole process from start to finish takes about 30 minutes, but most of that is hands-on cooking time. Here's a secret: you can make the beef filling hours ahead or even the day before. Just store it in an airtight container in the fridge, and when you're ready to assemble, gently reheat it in a skillet for a couple of minutes. This trick has saved me countless times when I'm trying to get dinner on the table fast.
Serving and Storage
Serve these hot and crispy—that's when they're at their best. The contrast between the warm, melted cheese and the cool sour cream or guacamole is part of what makes them so satisfying. If you have leftovers, wrap them loosely in foil and reheat them in a 350°F oven for about 10 minutes until the cheese is warm again. You can also store the beef filling separately for up to three days and assemble fresh quesadillas whenever you want. Leftover filling also makes an amazing taco or burrito situation, so nothing goes to waste.
- Always slice quesadillas immediately while the cheese is still molten—waiting even five minutes makes them harder to cut cleanly
- If your tortillas are drying out, wrap them in a damp kitchen towel before cooking to keep them pliable
- Don't be afraid to make more filling than you think you need—people always come back for seconds
 Save to Pinterest
 These quesadillas remind me that sometimes the best meals are the ones we make without overthinking it—just good ingredients, a hot pan, and the knowledge that something delicious is about to happen. Make them tonight.
Recipe Questions
- → What type of cheese works best for these quesadillas?
-
A combination of shredded cheddar and Monterey Jack cheeses provides a perfect balance of sharpness and meltiness for a creamy texture.
- → Can I use different meats for the filling?
-
Yes, ground turkey or chicken can be substituted for a lighter option while maintaining flavor and texture.
- → How do I prevent tortillas from becoming soggy?
-
Cook the filling thoroughly before assembling and ensure to brown tortillas on medium heat until crisp to keep them firm.
- → What spices enhance the beef filling flavor?
-
Ground cumin, chili powder, smoked paprika, salt, and black pepper add depth and a subtle smoky heat to the beef.
- → Are there any quick vegan alternatives?
-
Replacing beef with seasoned sautéed vegetables and using plant-based cheese can create a delicious plant-friendly version.
