 Save to Pinterest
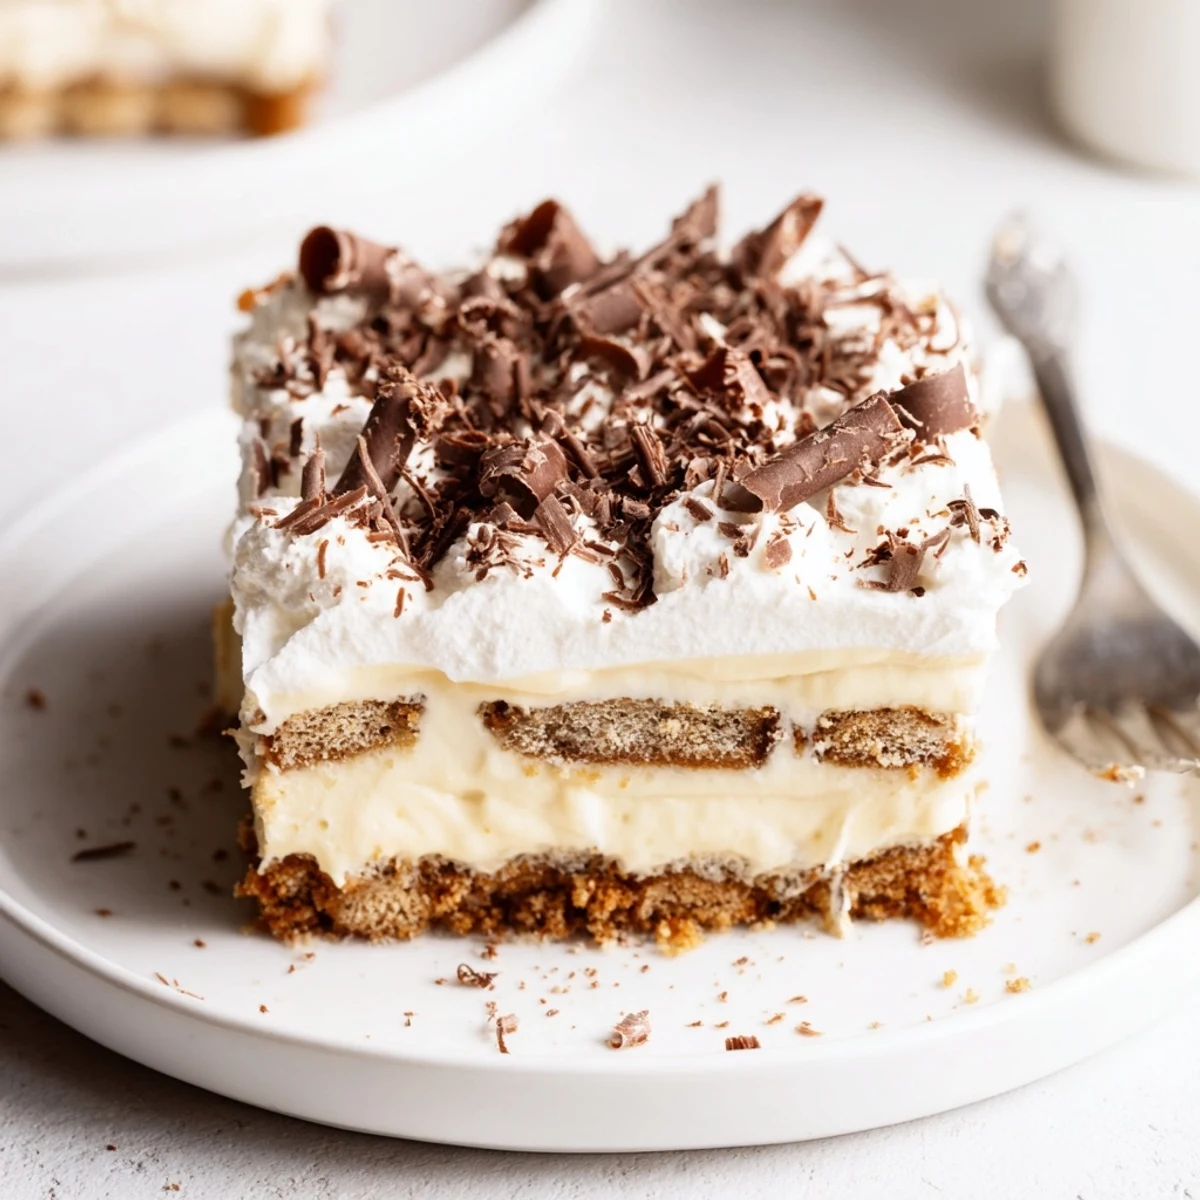
 This no-bake layered dessert builds a crisp cookie base pressed with melted butter, a cloud-like whipped cream layer, and a silky instant vanilla pudding middle. Assemble by spreading half the whipped cream over the cookie crust, add pudding, top with remaining cream and chill at least two hours. Finish with chocolate shavings or fresh berries and slice to serve chilled.
Unpacking the grocery bag after a long day, I realized I needed something effortless yet impressive for dessert. The rhythm of crumbling biscuits and swirling cream, paired with the laughter echoing from the other room, set a calm, almost playful mood in the kitchen. Sometimes I feel that building this no bake layered dessert is almost therapeutic, like stacking edible clouds into sweet, chilly strata. No messing with timers or hot ovens—just a bit of patience while it chills and transforms into something totally irresistible.
Last spring, my friend Lisa showed up with flowers unexpectedly, and I felt inspired to whip up something she’d never tried before. We assembled it together, sneaking tastes and marveling as each layer began to settle. The clink of mixing bowls and her delighted gasp at the finished slice made me realize how sharing a simple treat could turn any ordinary day into something memorable. That batch didn't even last the evening.
Ingredients
- Graham crackers or digestive biscuits: These form the buttery foundation, and crushing them by hand adds some rustic charm and a bonus stress relief.
- Unsalted butter: Melt it slowly so the base comes together evenly; I learned the hard way rushing creates lumps.
- Heavy whipping cream: Chill your bowl first—cold cream whips up fluffiest, and that's key for dreamy layers.
- Powdered sugar: It dissolves instantly, giving the cream sweetness without any grittiness.
- Vanilla extract: Just a splash wakes up all the creamy flavors; real vanilla really stands out here.
- Instant vanilla pudding mix: The shortcut that never fails; pick your favorite brand for crowd-pleasing flavor.
- Whole milk: Cold milk is essential for setting the pudding to the right consistency—lukewarm just won’t cut it.
- Chocolate shavings or cocoa powder: This finishing touch gives a hint of luxury and makes the whole dessert look like a showstopper.
Instructions
- Prepare the Cookie Base:
- Mix crushed graham crackers with melted butter until every crumb glistens. Press the mixture firmly into the base of your baking dish, making sure you reach every corner with the back of a spoon.
- Whip Up the Cream:
- In a chilled bowl, beat heavy cream, powdered sugar, and vanilla until stiff peaks form; you'll hear whisk beats soften as it comes together. The cream should be thick enough to hold its shape when you lift the whisk.
- Mix the Pudding:
- Pour cold milk over the instant pudding mix and whisk vigorously for 2 minutes until smooth and silky. Let it stand for 5 minutes as it magically thickens.
- Layer the Cream:
- Spread half the whipped cream gently over the cookie base; go slowly to keep crumbs from sneaking into the cream. Use a spatula in gentle swirls for a silky layer.
- Add the Pudding Layer:
- Spoon prepared vanilla pudding over the cream, nudging gently to keep the layers defined. Smooth it out to the very edges for even bites later on.
- Top with More Cream:
- Add the rest of the whipped cream in gentle heaps, and then even it out with patient, long strokes. The soft peaks make it look so inviting.
- Finish and Chill:
- Sprinkle chocolate shavings or dust with cocoa powder for a little flair. Cover and refrigerate for at least 2 hours so all the layers become sliceable perfection.
- Serve:
- Use a hot, dry knife to slice through cleanly, then serve chilled for best texture and flavor.
 Save to Pinterest
 When I made this for my nephew’s small birthday dinner, watching him pause mid-conversation and grin after that first bite was the best part of the day. It is always the simplest desserts that get remembered the longest.
Choosing Your Favorite Toppings
I often open the fridge and grab whatever appeals—a sprinkle of chopped nuts, fresh raspberries, or even a fine dusting of cinnamon. Each tweak gives the dessert a new personality, and no two batches are ever quite alike. Even the most classic chocolate shavings suddenly feel inventive next to a few candied orange strips.
Making It Ahead of Time
One secret to this recipe’s success is prepping a day in advance, letting the flavors mingle while you relax. There’s no better feeling than pulling a dreamy, fully set treat from the fridge when guests arrive. Even hectic weeknights feel celebratory with a slice waiting.
Adapting for Special Diets and Preferences
Experimenting with non dairy milk and gluten free cookies turned out easier than I expected—just check the pudding mix for hidden dairy. For extra richness, swap in flavored puddings or layer with fruit like sliced bananas or strawberries. It quickly becomes a dessert you can shape for any table and craving.
- Store leftovers tightly covered to keep them soft.
- Let the assembled dessert sit out for 10 minutes before slicing if chilled overnight.
- Always taste the cream before layering—sometimes a pinch more sugar makes all the difference.
 Save to Pinterest
 By the time you serve this, you might wish you had made a double batch. Whether it is a last minute treat or a planned centerpiece, there is always a reason for another slice.
Recipe Questions
- → How long should it chill before serving?
-
Chill at least two hours to allow the pudding and cream layers to set; overnight refrigeration gives the best texture and melded flavors.
- → How can I keep the cookie base crisp?
-
Use finely crushed graham crackers and mix thoroughly with melted butter, then press firmly into the pan. For extra protection against sogginess, spread a thin layer of melted chocolate over the crust and let it set before adding wet layers.
- → Can I substitute the instant pudding?
-
Yes. A cooled homemade custard or pastry cream works well—just ensure it is fully chilled before layering so it doesn’t soften the whipped cream.
- → Are there dairy-free alternatives?
-
Swap heavy cream for chilled coconut cream whipped to stiff peaks and use plant-based milk with a compatible instant pudding or a cornstarch-thickened custard to maintain texture.
- → Will adding fresh fruit make it soggy?
-
Fresh berries or banana slices add brightness but can release moisture. Pat fruit dry, add in a single thin layer, and consume within a day for best texture.
- → What's the best way to store leftovers?
-
Keep covered in the refrigerator for up to 3 days. For clean slices, run a knife under hot water, dry it, then cut; return portions to cold storage promptly.
