 Save to Pinterest
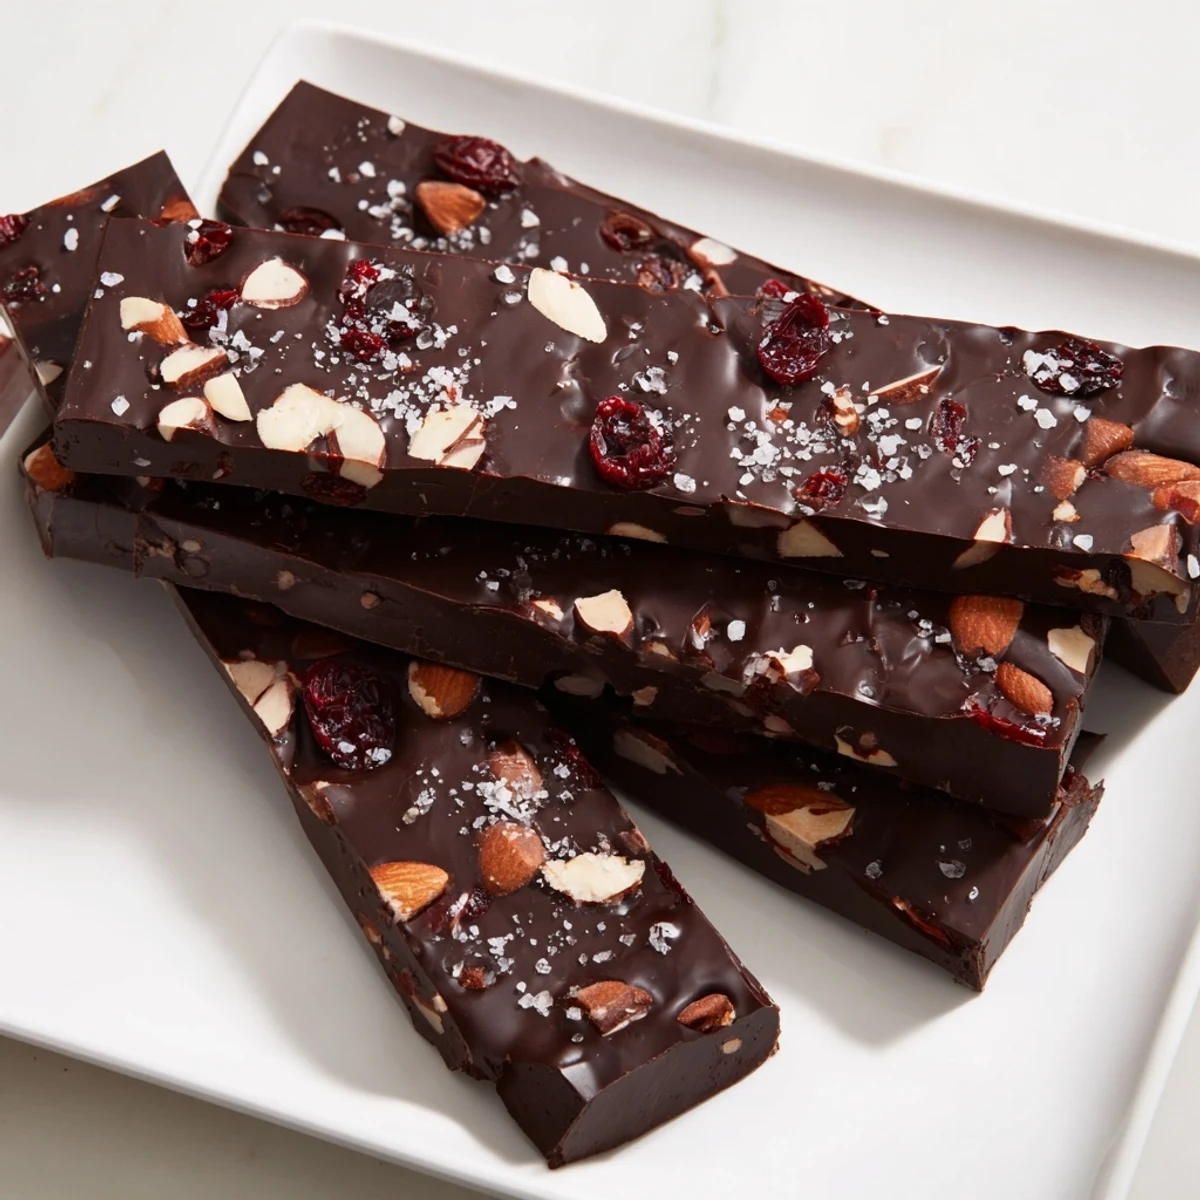
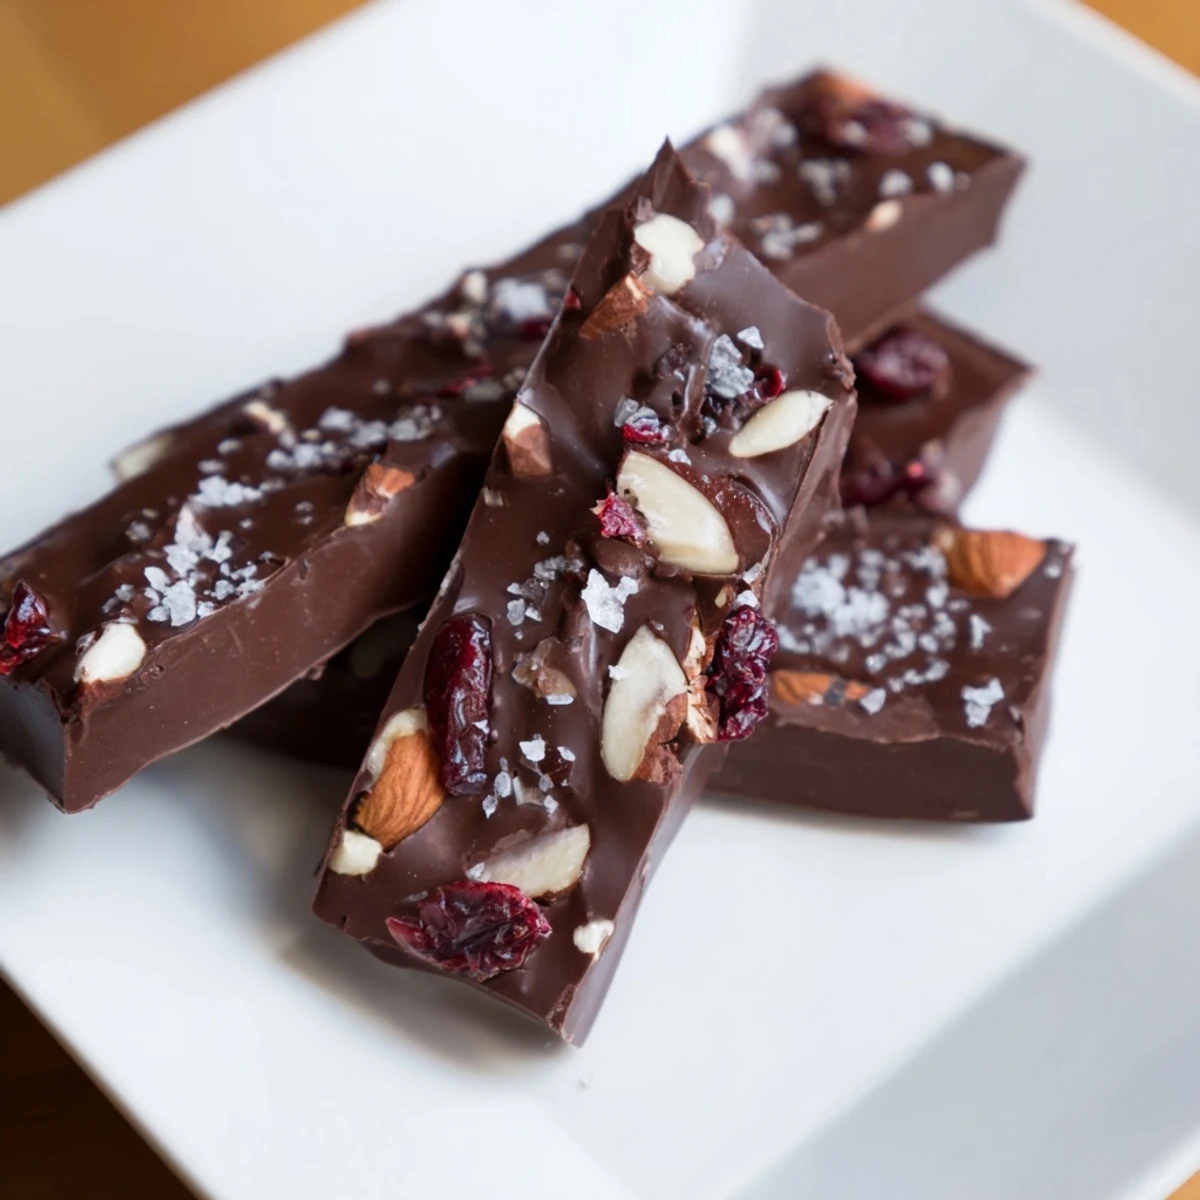
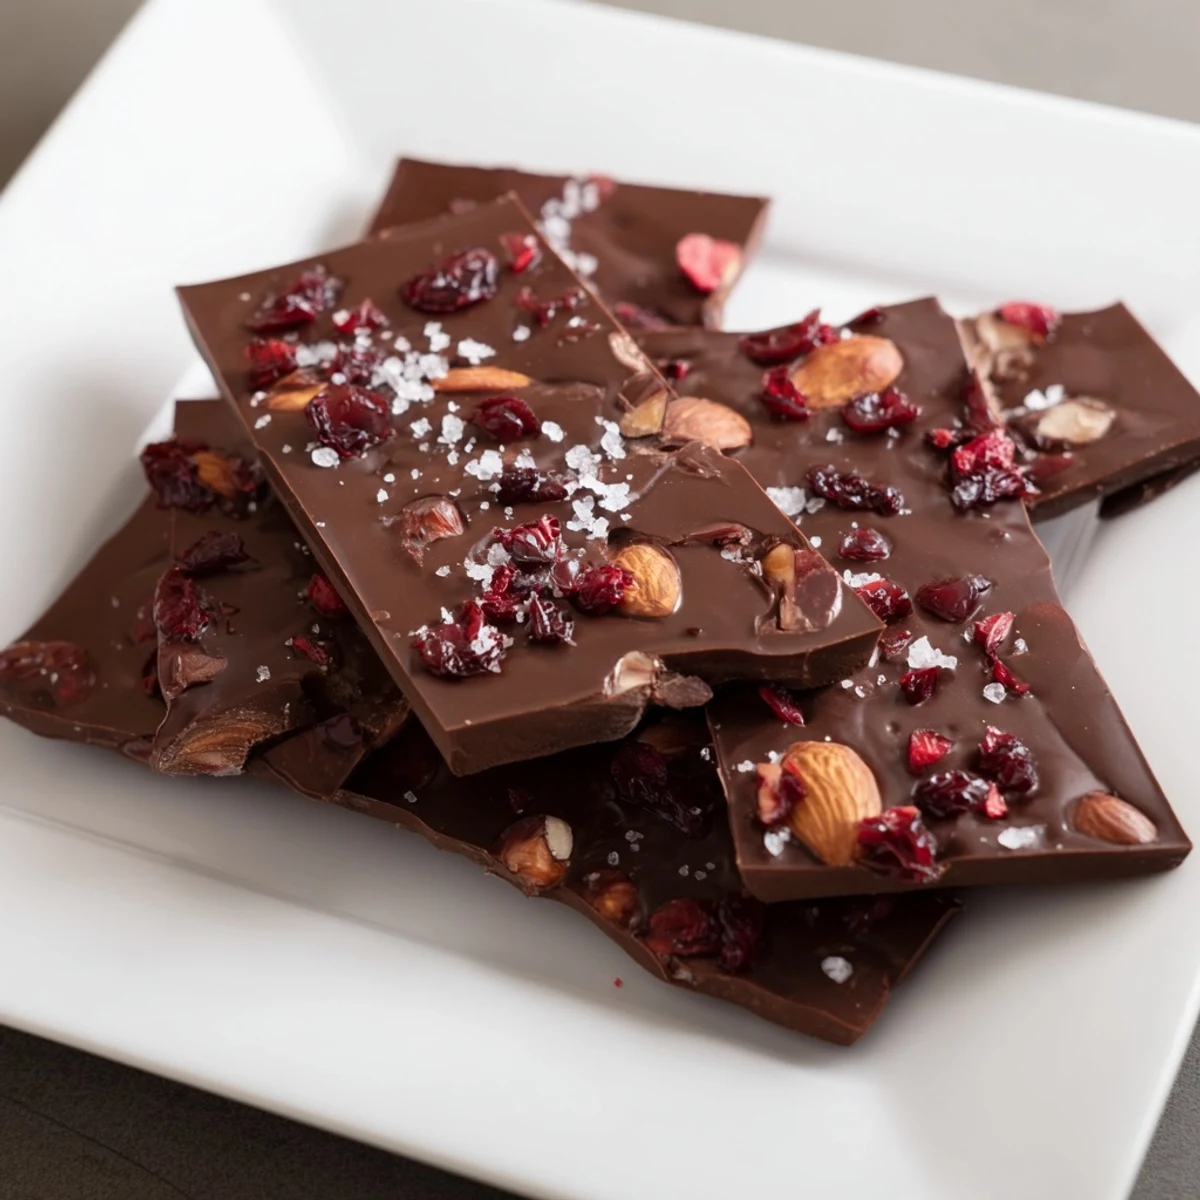
 This smooth and creamy chocolate bar offers a rich cocoa flavor balanced with buttery sweetness. Chopped roasted nuts and dried fruit add delightful texture and depth. The mixture is gently melted, combined, and chilled until set, creating satisfying bars perfect for snacking or gifting. Variations include using different chocolate types or adding spices for unique twists.
I stumbled into making homemade chocolate bars by accident one rainy afternoon, hunting through the pantry for something to do with a block of expensive dark chocolate I'd been saving. What started as a five-minute experiment turned into the kind of thing I now make constantly, partly because it's ridiculously simple, but mostly because there's something deeply satisfying about wrapping homemade chocolate in parchment paper and calling it a gift. The smell alone—that warm cocoa melting with butter—makes the whole kitchen feel like a small luxury.
I made a batch of these for my neighbor after she helped me move last spring, and watching her face when she bit into one was worth every minute of effort. She kept asking if I'd bought them from somewhere fancy, which I loved because the secret is just patience and decent chocolate—nothing else. That box became the reason I started making them regularly, because people genuinely light up when they realize you made actual chocolate from scratch.
Ingredients
- High-quality dark chocolate (70% cocoa or higher), 200 g: This is where you don't skimp—cheap chocolate will taste thin and waxy, while good chocolate becomes silky and complex when melted.
- Unsalted butter, 50 g: The butter adds smoothness and helps the chocolate set with a gentle snap rather than feeling dense.
- Powdered sugar, 30 g: Just enough to balance the bitterness without making these taste like candy.
- Vanilla extract, 1 tsp: A small touch that somehow makes the chocolate taste more like itself.
- Roasted nuts (almonds, hazelnuts), 40 g (optional): Adds texture and a subtle earthiness that plays beautifully against dark chocolate.
- Dried fruit (cranberries, raisins), 30 g (optional): Brings little pockets of tartness that keep the bars interesting.
- Sea salt, pinch: A whisper of salt makes chocolate taste richer and keeps it from being one-dimensional.
Instructions
- Prepare your canvas:
- Line a small loaf pan or chocolate mold with parchment paper, leaving a little overhang so you can lift the finished bars out easily. If you don't have parchment, a light grease works, but you'll have a harder time getting them out clean.
- Melt chocolate and butter together:
- Combine your chopped chocolate and butter in a heatproof bowl set over a saucepan of gently simmering water—this gentle double boiler method keeps the chocolate from seizing or getting grainy. Stir occasionally until everything is smooth and warm to the touch, which usually takes about 5 minutes.
- Add sweetness and flavor:
- Take the bowl off the heat and stir in the powdered sugar and vanilla extract until there are no lumps and the mixture looks glossy. This is where you taste and decide if you want more vanilla or if the chocolate is speaking loudly enough on its own.
- Fold in your mix-ins:
- If you're using nuts, dried fruit, or sea salt, gently fold them into the chocolate now so they're distributed throughout rather than sinking to the bottom. Don't overmix—just a few folds are enough.
- Pour and smooth:
- Pour the chocolate mixture into your prepared mold and use a spatula to smooth the top into an even layer. Take a moment to make it look nice because this is what people will see first.
- Release the air bubbles:
- Gently tap the mold on the counter a few times to encourage air bubbles to float up and pop, which gives you a denser, more professional-looking finished bar.
- Chill until set:
- Refrigerate for at least 40 minutes, though if you have the patience, an hour is even better. You'll know it's ready when it feels firm to the touch and doesn't bend when you try to lift it.
- Remove, cut, and store:
- Pop the whole block out of the mold, cut it into 8 bars with a sharp knife (warming the blade under hot water helps it slice cleanly), and store them in an airtight container in a cool spot where they'll stay perfect for weeks.
 Save to Pinterest
 There's a moment, right when you pull these out of the fridge and the chocolate snaps cleanly under your knife, where you realize you've created something that tastes expensive but cost almost nothing. That's when making chocolate stops being a recipe and becomes a small ritual.
Flavor Variations That Feel Natural
Once you've made these once, you'll start seeing possibilities everywhere—a sprinkle of chili flakes turns them into something sophisticated and slightly spicy, while espresso powder deepens the cocoa flavor until it tastes almost mysterious. For a sweeter bar, swap in milk or white chocolate, though the technique stays exactly the same. Each variation teaches you something new about how flavors interact.
Substitutions for Dietary Needs
Making these vegan is as simple as swapping the butter for coconut oil and using dairy-free chocolate—the bars come out equally creamy because the ratio of fat to chocolate is what matters, not the source of that fat. I've made batches where I've left out the nuts entirely for friends with allergies, and honestly, the plain chocolate bar is elegant in its simplicity. You can also skip the dried fruit and add a handful of seeds for something entirely different.
Making These Your Own
The beauty of this recipe is how little you need to change it to make it feel like yours. Some people love adding a tiny bit of cinnamon or cardamom, while others swear by a touch of orange zest stirred in at the end. The basic technique is your foundation, and everything else is just playing around in the kitchen until something clicks.
- Keep a small notebook of add-in combinations you love so you remember which experiments worked.
- Double the recipe and freeze half so you always have homemade chocolate on hand for gifts or moments when you just need chocolate.
- Cut them slightly thinner if you want them to feel more luxurious and less heavy.
 Save to Pinterest
 There's something quietly powerful about handing someone a chocolate bar you made with your own hands—it says you thought of them, that you took time, that you cared enough to do something simple really well. Once you start making these, you might find yourself making them more often than you expected.
Recipe Questions
- → What type of chocolate is best for the bars?
-
High-quality dark chocolate with 70% cocoa or higher provides the best rich and intense flavor for these bars.
- → Can I add nuts or dried fruit?
-
Yes, chopped roasted nuts like almonds or hazelnuts and dried fruits such as cranberries or raisins can be folded into the mixture for extra texture and flavor.
- → How long does chilling take?
-
Refrigerate the chocolate mixture for at least 40 minutes until fully set and firm enough to cut into bars.
- → Can I substitute butter in this bar?
-
Butter is used for creaminess, but coconut oil can be used as a vegan alternative while maintaining smooth texture.
- → Are these bars gluten-free?
-
Yes, the bars use gluten-free ingredients, but always check labels if using add-ins to ensure no gluten contamination.
