 Save to Pinterest
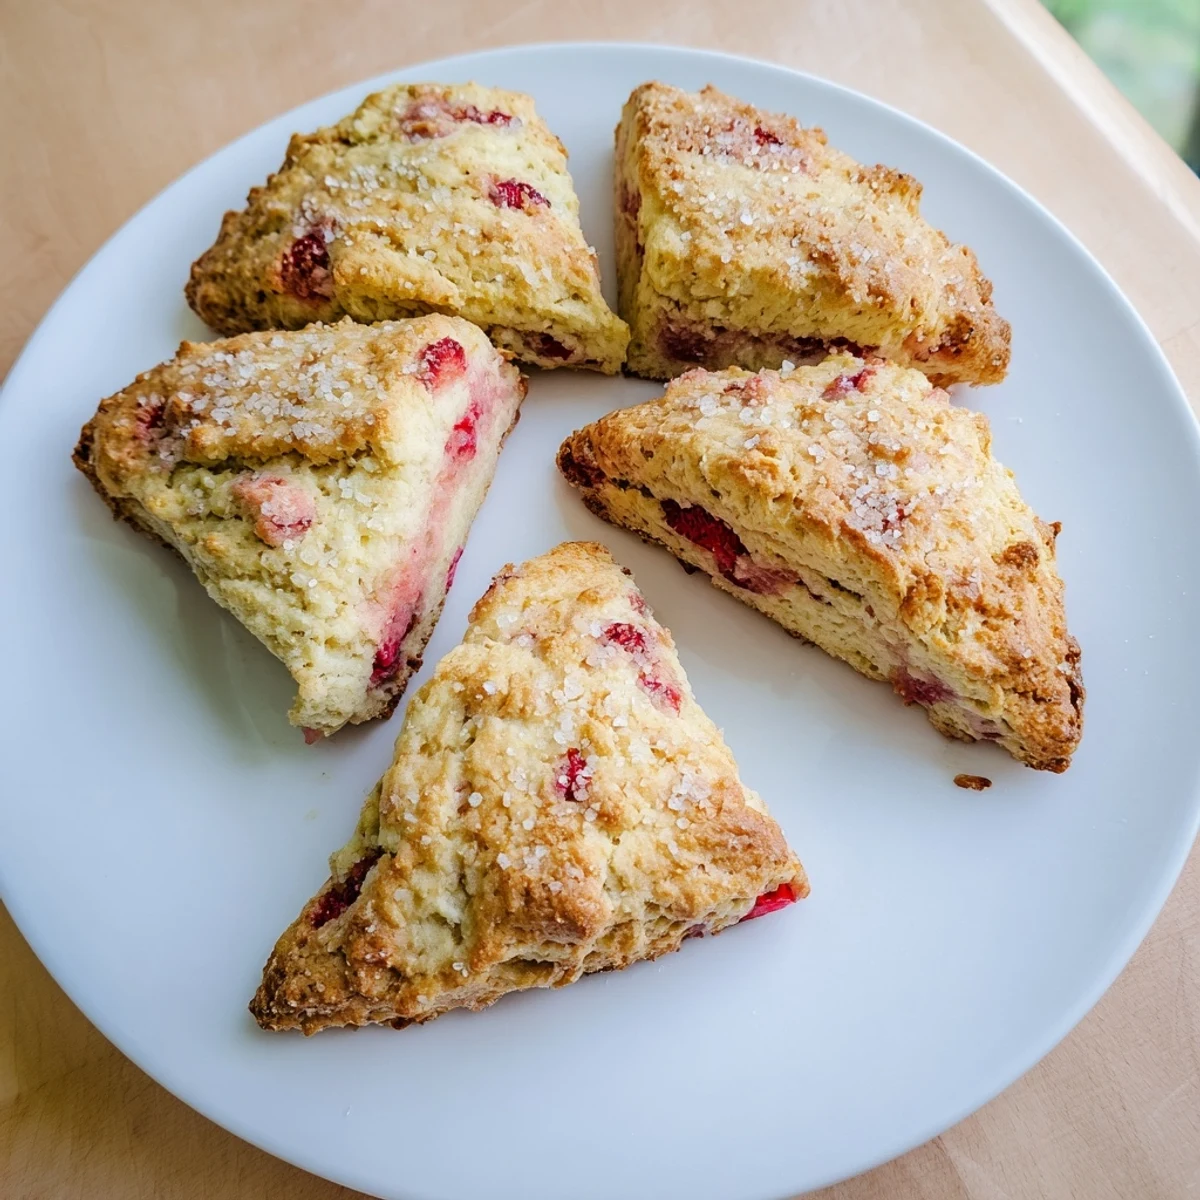
 These tender, flaky scones combine fresh strawberries with rich cream for an irresistible treat. The dough comes together quickly with cold butter, heavy cream, and sour cream creating that perfect crumbly texture. Fresh diced strawberries add sweetness throughout every bite.
Bake until golden brown and serve warm for the best experience. The coarse sugar topping adds a delightful crunch that pairs beautifully with the soft interior. Ideal for lazy weekend breakfasts or elegant afternoon tea gatherings.
My neighbor Margaret brought over a basket of strawberries from her garden last summer, and I stood there wondering what to do with all that ripe fruit before it turned. These scones were born from that happy abundance, and now every June finds me in the kitchen with flour-dusted countertops and stained fingers.
I made these for a weekend brunch when my sister was visiting, and she actually went silent for a full minute after taking her first bite. Thats the highest compliment shes ever paid my baking, and these scones have earned a permanent spot in our family gatherings ever since.
Ingredients
- All-purpose flour: The foundation of your scone structure. I've learned that measuring by weight gives the most consistent results, but if you don't have a scale, fluff your flour before spooning it into the measuring cup.
- Granulated sugar: Just enough to sweeten without overpowering the natural strawberry flavor. The strawberries themselves contribute plenty of sweetness as they bake down.
- Baking powder: This is what gives your scones their rise. Make sure yours is fresh, otherwise you'll end up with dense hockey pucks instead of fluffy pastries.
- Salt: A quarter teaspoon might seem small, but it's essential for balancing the sweetness and making all the flavors pop.
- Heavy cream: Cold cream creates the tenderest crumb imaginable. The fat content is crucial here, so don't try substituting milk.
- Sour cream or Greek yogurt: Adds a subtle tang that cuts through the richness and helps tenderize the dough. Full-fat versions work best for texture.
- Egg: Binds everything together and adds structure. Use it straight from the fridge for best results with cold ingredients.
- Vanilla extract: Pure extract makes a noticeable difference in flavor. It's worth the extra expense compared to imitation.
- Fresh strawberries: The star of the show. Hull them carefully and dice them into small, even pieces so they distribute throughout the dough without making it too wet.
- Cold unsalted butter: Cold butter is non-negotiable for flaky layers. Cut it into small cubes beforehand so it incorporates evenly into the flour.
- Heavy cream for brushing: Creates that beautiful golden finish on top and helps the sugar adhere.
- Coarse sugar: This optional topping adds a delightful crunch that contrasts perfectly with the tender crumb beneath.
Instructions
- Preheat and prepare:
- Set your oven to 400°F and line a baking sheet with parchment paper. This step might seem basic, but having everything ready before you start working with cold butter will save you from frantic last-minute prep while your dough sits.
- Whisk the dry ingredients:
- In a large bowl, combine the flour, sugar, baking powder, and salt. Whisk them together thoroughly so the baking powder distributes evenly throughout the flour.
- Cut in the butter:
- Add those cold butter cubes to your flour mixture and work them in with a pastry cutter or your fingertips. You want to stop when the mixture looks like coarse crumbs with some pea-sized pieces of butter still visible. These butter pockets are what will create flaky layers as they bake.
- Mix the wet ingredients:
- In a separate bowl, whisk together the cream, sour cream, egg, and vanilla extract until smooth. Keeping everything cold is key to maintaining the butter's temperature.
- Combine the mixtures:
- Pour the wet ingredients into the dry and stir gently with a spatula or wooden spoon. Stop as soon as no dry flour remains visible. Overworking at this stage will make your scones tough.
- Fold in the strawberries:
- Gently fold in the diced strawberries, being careful not to crush them. You want them distributed throughout but still holding their shape.
- Shape the dough:
- Turn the dough onto a lightly floured surface and pat it into a 1-inch-thick round. Don't knead it, just gently press it together with your hands.
- Cut into wedges:
- Use a sharp knife or bench scraper to cut the round into 8 wedges like a pizza. A sharp cut helps the scones rise properly by separating the layers.
- Arrange on the baking sheet:
- Transfer the wedges to your prepared baking sheet, leaving a little space between them. They'll puff up as they bake, so give them room to grow.
- Add the finishing touches:
- Brush the tops with cream and sprinkle with coarse sugar if you're using it. This simple step makes the scones look bakery-worthy and adds irresistible crunch.
- Bake to golden perfection:
- Bake for 16 to 18 minutes until the tops are golden brown and a toothpick inserted in the center comes out clean. The kitchen will smell absolutely incredible during these last few minutes.
- Cool before serving:
- Let the scones cool on a wire rack for 10 minutes. This is torture when they smell this good, but it helps them set properly and makes slicing easier.
 Save to Pinterest
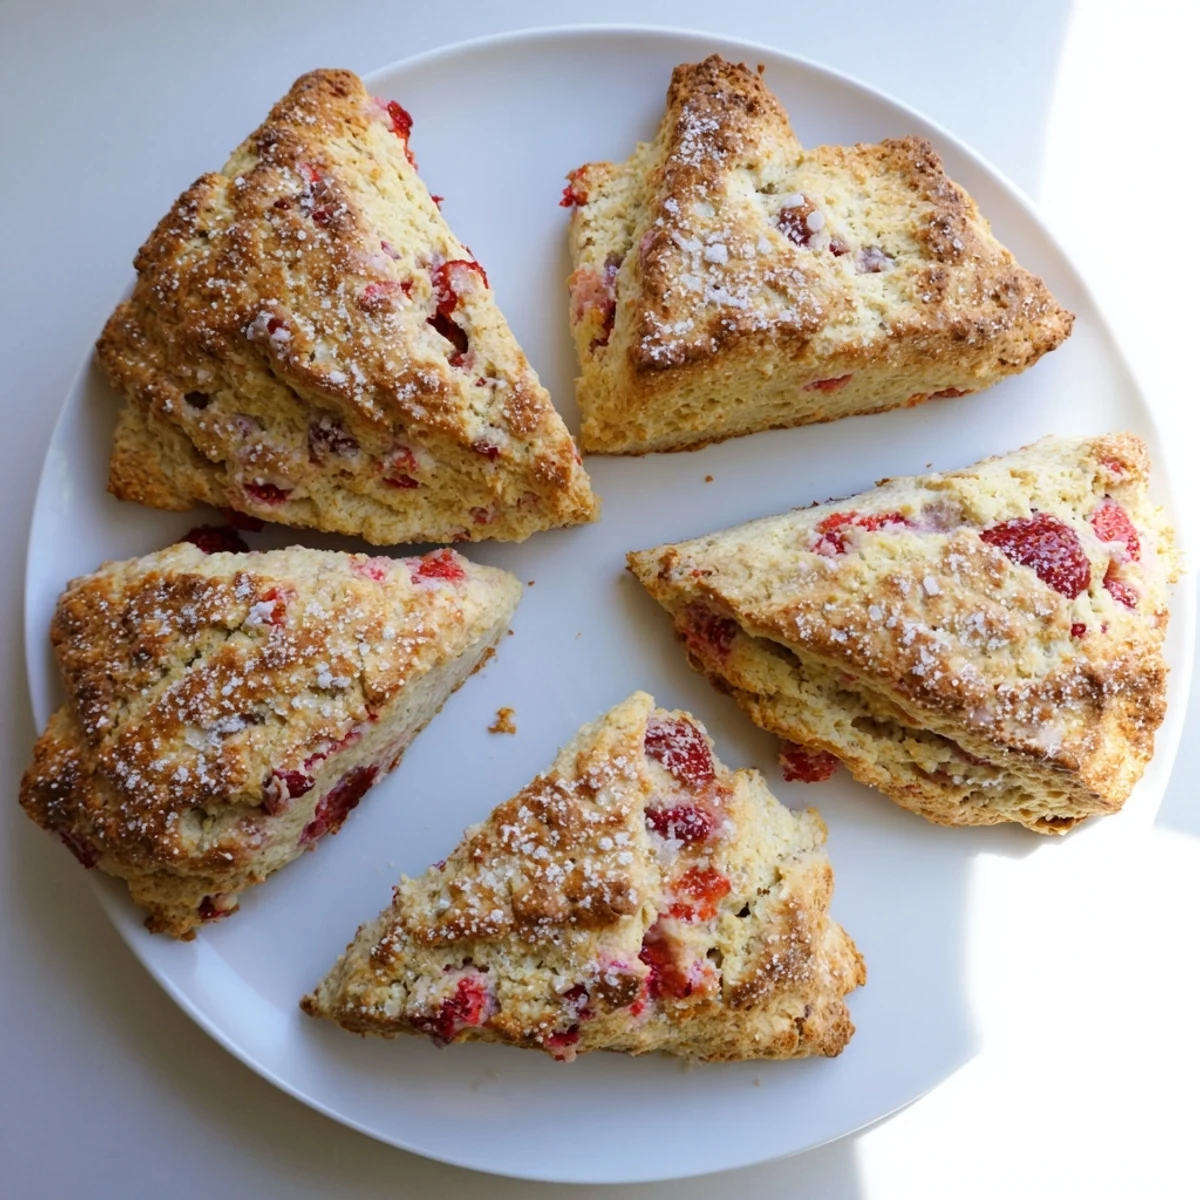
 These scones became a tradition in our house after that first batch for my sister's visit. Now they're how we celebrate strawberry season, how we welcome weekend guests, and how I turn ordinary mornings into something worth lingering over.
Making Them Ahead
I've discovered you can freeze the unbaked wedges on a baking sheet, then transfer them to a bag once solid. Bake them straight from frozen, adding a couple of minutes to the baking time. This means you can have fresh-baked scones on a weekday morning without any early-morning effort.
Perfecting Your Technique
After dozens of batches, I've found that handling the dough as little as possible is the secret to tall, flaky scones. Work quickly and confidently, and don't worry if the dough looks slightly messy. Rustic-looking scones often taste better than picture-perfect ones anyway.
Serving Suggestions
These are wonderful split in half and served with clotted cream or softened butter, but honestly, they're perfect on their own while still slightly warm. The contrast between the crunchy sugar topping and the tender strawberry-studded interior is something special.
- Try adding lemon zest to brighten the strawberry flavor
- Swap in other berries when strawberries aren't in season
- Freeze extra baked scones and reheat in a 350°F oven for 5 minutes
 Save to Pinterest
 There's something deeply satisfying about pulling a batch of these from the oven, golden and fragrant, and knowing that the next hour will involve good conversation and lingering over coffee with people you love.
Recipe Questions
- → Can I use frozen strawberries instead of fresh?
-
Frozen strawberries work, but thaw and drain them thoroughly before adding. Excess moisture can make the dough too wet. Pat them dry with paper towels to prevent sogginess.
- → How do I store leftover scones?
-
Store in an airtight container at room temperature for up to 2 days. For longer storage, freeze individually wrapped scones for up to 3 months. Reheat in a 350°F oven for 5-10 minutes.
- → What's the secret to flaky scones?
-
Keep everything cold—butter, cream, and even your mixing bowl. Work quickly and avoid overhandling the dough. The cold butter creates steam pockets during baking, resulting in flaky layers.
- → Can I make the dough ahead of time?
-
Yes, prepare the dough, cut into wedges, and freeze unbaked on a baking sheet. Once frozen, transfer to a bag. Bake from frozen, adding 2-3 minutes to the baking time.
- → What can I serve with these scones?
-
Enjoy warm with clotted cream, butter, or lemon curd. Fresh strawberries on the side complement the flavor perfectly. A cup of Earl Grey or English Breakfast tea makes the ideal pairing.
