 Save to Pinterest
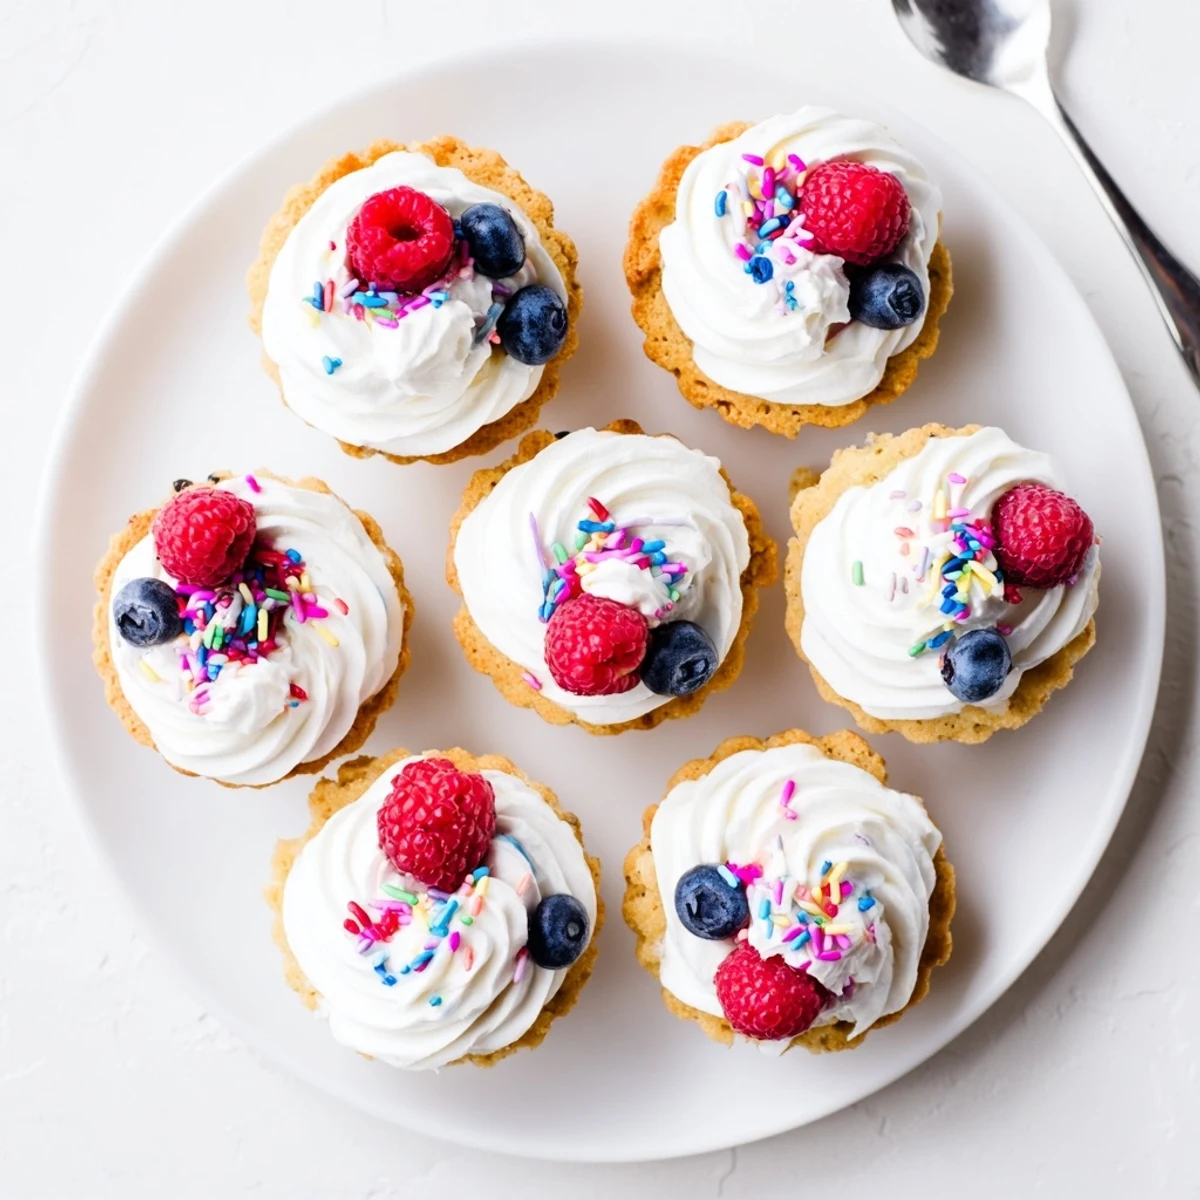
 These adorable sugar cookie cups combine the classic taste of homemade sugar cookies with a fun, portable presentation. Baked in mini muffin tins, each cup features a crispy edge and soft center that's perfect for holding your favorite fillings.
The vanilla-infused cookie dough comes together quickly with basic pantry staples. Once baked and cooled, the cups are ready to be filled with freshly whipped vanilla cream, lemon curd, or rich chocolate ganache. Top with fresh berries, colorful sprinkles, or mini chocolate chips for a crowd-pleasing treat.
Ideal for birthdays, holidays, or casual gatherings, these handheld delights appeal to both kids and adults. Make them ahead and store unfilled for up to three days, then add your chosen filling just before serving for the freshest texture.
The smell of vanilla always pulls me back to my grandmother's kitchen, where she'd let me stand on a chair to reach the counter. These sugar cookie cups became my go-to treat after I discovered how perfectly they hold fillings like little edible bowls. Now they're the first thing friends request when I host gatherings, and I love how something so simple brings such pure joy.
Last summer, I made three dozen of these for my niece's birthday party, watching kids' eyes light up when they discovered the surprise centers. The best moment was seeing my usually picky eater nephew ask if I could teach him how to make them. That afternoon in the kitchen, covered in flour and sprinkles, became one of my favorite memories.
Ingredients
- All-purpose flour: This creates the sturdy structure that holds its shape in the muffin tin while still tender enough to bite through easily
- Unsalted butter: Room temperature butter incorporates beautifully into the sugar, creating those airy pockets that make cookies melt in your mouth
- Granulated sugar: The sweetness that balances the buttery richness, while helping the edges crisp up perfectly in the oven
- Vanilla extract: Pure vanilla makes all the difference here, infusing every crumb with that warm comforting flavor we all love
- Heavy cream: When whipped to stiff peaks, this creates the cloudlike filling that contrasts beautifully with the crisp cookie shell
Instructions
- Prepare your baking space:
- Preheat your oven to 350°F and lightly grease every cup of your 24-cup mini muffin tin with butter or cooking spray.
- Mix the dry foundation:
- In a medium bowl, whisk together the flour, baking soda, and salt until they're uniformly combined and aerated.
- Cream the butter and sugar:
- Beat the softened butter and granulated sugar in a large bowl for about 2 minutes until the mixture turns pale and fluffy, scraping down the sides halfway through.
- Add the wet ingredients:
- Beat in the egg and vanilla extract until everything is fully incorporated, with the mixture looking smooth and glossy.
- Combine everything:
- Gradually add the dry ingredients to the wet mixture, mixing on low speed just until no flour streaks remain—overworking makes tough cookies.
- Shape the cups:
- Scoop about 1 tablespoon of dough into each muffin cup, then use your thumb or the back of a spoon to gently press the dough up the sides, forming a cup shape.
- Bake to golden perfection:
- Bake for 10 to 12 minutes until the edges are lightly golden and the centers look set but slightly soft.
- Define the cup shape:
- Immediately after removing from the oven, gently press the center of each cookie with the back of a spoon to deepen the indentation.
- Cool completely:
- Let them rest in the tin for 10 minutes, then carefully transfer to a wire rack to cool fully before filling.
- Create the filling:
- Whip the chilled heavy cream with powdered sugar and vanilla in a cold bowl until stiff peaks form, being careful not to overwhip.
- Fill and decorate:
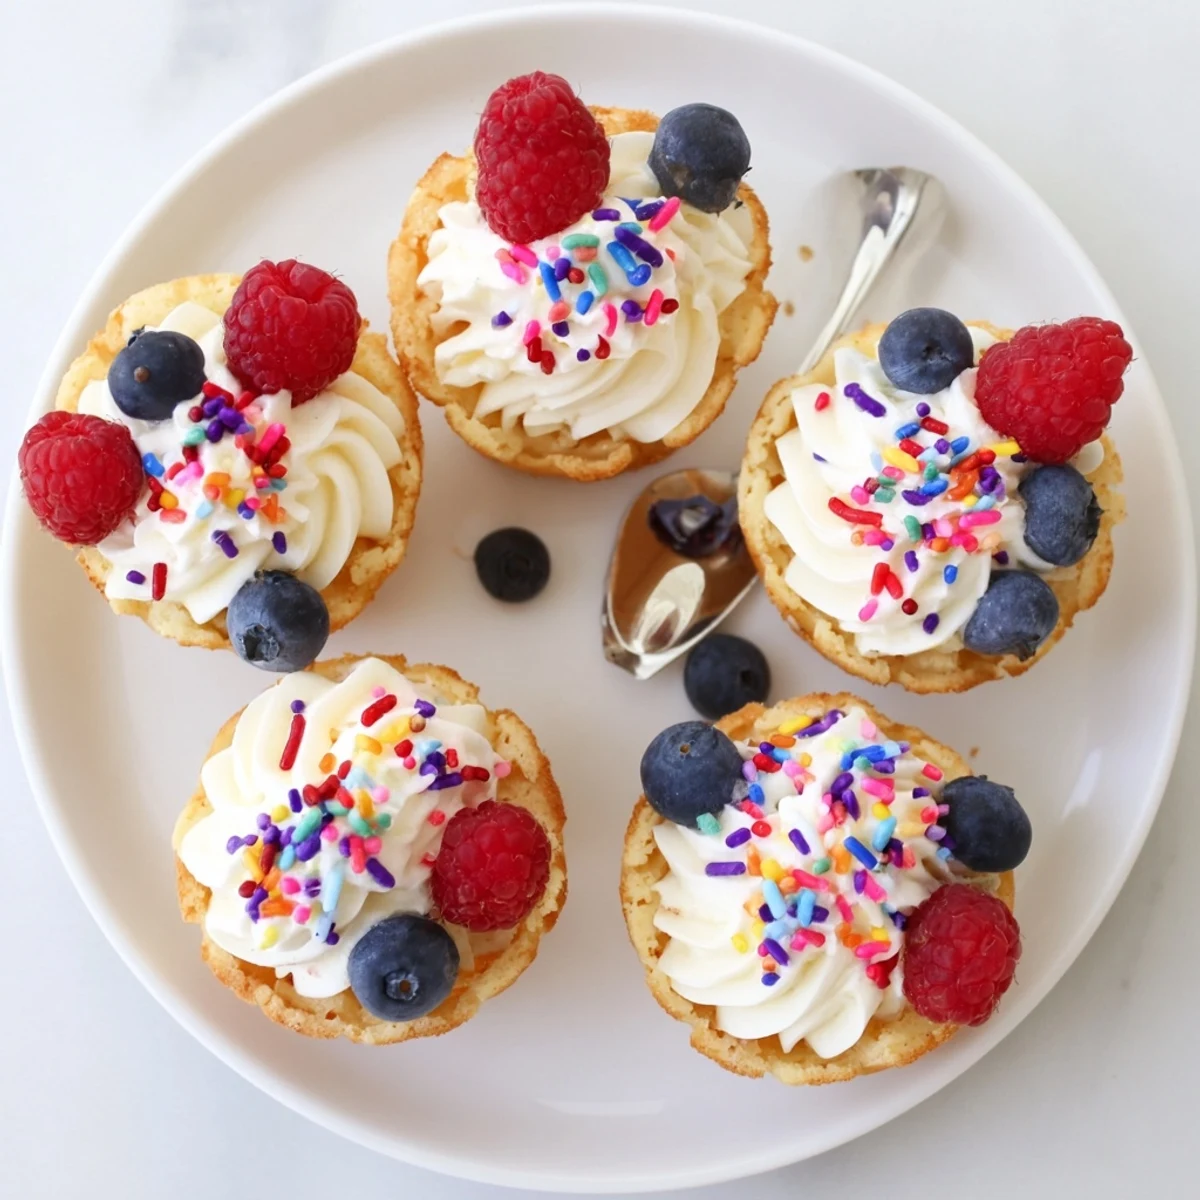
- Spoon or pipe the whipped cream into each cooled cookie cup, then top with fresh berries, sprinkles, or mini chocolate chips.
 Save to Pinterest
 These cookie cups have become my secret weapon for potlucks because they look impressive but come together so quickly. I love watching people's faces when they bite into that first one, discovering the creamy center hidden inside. They're the kind of treat that turns an ordinary gathering into something memorable.
Making Them Ahead
I've learned through experience that baking the cookie cups a day in advance works beautifully, as long as they're stored in an airtight container at room temperature. The filling should be whipped and added no more than a few hours before serving to maintain that perfect fluffy texture. This prep-ahead strategy saved me more than once when hosting dinner parties.
Filling Variations
Beyond the classic vanilla cream, I've filled these cups with lemon curd for spring brunches, chocolate ganache for holiday desserts, and even cheesecake filling for birthday celebrations. The cookie shell is neutral enough to complement almost any flavor you can imagine. Sometimes I'll do a mix of fillings on one platter so guests can try different combinations.
Getting Creative
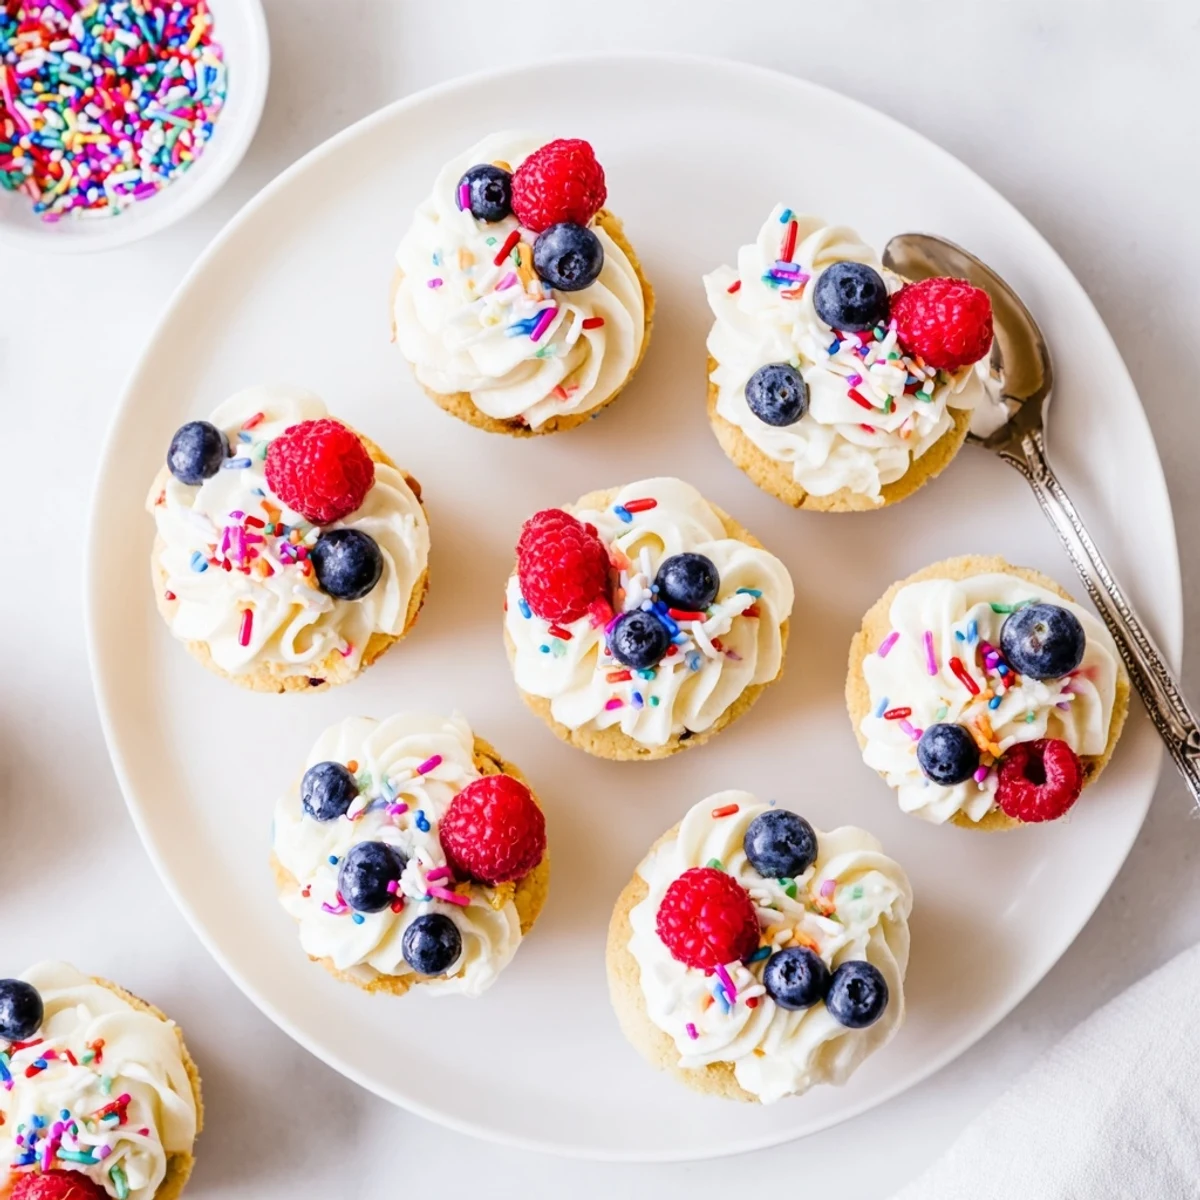
Colored dough makes these even more festive for holidays—I've done pastel swirls for Easter, red and green swirls for Christmas, and bright rainbow colors for kids' parties. You can also roll the edges in sprinkles before baking for an extra pop of color and texture. The possibilities are endless once you start experimenting.
- Add a drop of gel food coloring to the dough for vibrant themed cookie cups
- Try rolling the dough balls in colored sugar before pressing into the muffin tin for sparkly edges
- Set up a topping bar and let guests customize their own filled cups
 Save to Pinterest
 There's something magical about watching people discover what's inside these little cookie cups, like opening dozens of tiny delicious presents. Hope they bring as much joy to your kitchen as they've brought to mine.
Recipe Questions
- → How do I prevent the cookie cups from sticking to the muffin tin?
-
Lightly grease your mini muffin tin with butter or cooking spray before adding the dough. Allow the cups to cool in the tin for about 10 minutes after baking, then carefully twist gently to release. Using a silicone muffin tin can also make removal easier.
- → Can I make the cookie dough ahead of time?
-
Yes, you can prepare the dough up to 2 days in advance and store it wrapped tightly in the refrigerator. Let it come to room temperature for about 15 minutes before scooping into the muffin cups. You can also freeze the dough for up to 3 months.
- → What other fillings work well in sugar cookie cups?
-
Beyond vanilla cream, try filling with lemon curd for a bright citrus twist, chocolate ganache for richness, cream cheese frosting, fruit preserves, or even ice cream just before serving. Peanut butter and marshmallow fluff also make delicious combinations.
- → How long do filled cookie cups stay fresh?
-
For best texture, fill the cookie cups just before serving. Unfilled cups can be stored in an airtight container at room temperature for up to 3 days. Once filled with cream, they should be refrigerated and enjoyed within 24 hours, as the filling can make the cookies soft.
- → Can I freeze baked sugar cookie cups?
-
Absolutely! Bake and cool the cups completely without filling, then freeze in a freezer-safe container or bag with parchment paper between layers for up to 3 months. Thaw at room temperature for about an hour, then add your desired filling before serving.
- → Why do my centers puff up too much during baking?
-
If the centers rise too much, press them down firmly with the back of a spoon immediately after removing from the tin while they're still warm. You can also gently reshape the cups with your fingers. Reshaping while warm helps maintain that perfect cup shape for filling.
