 Save to Pinterest
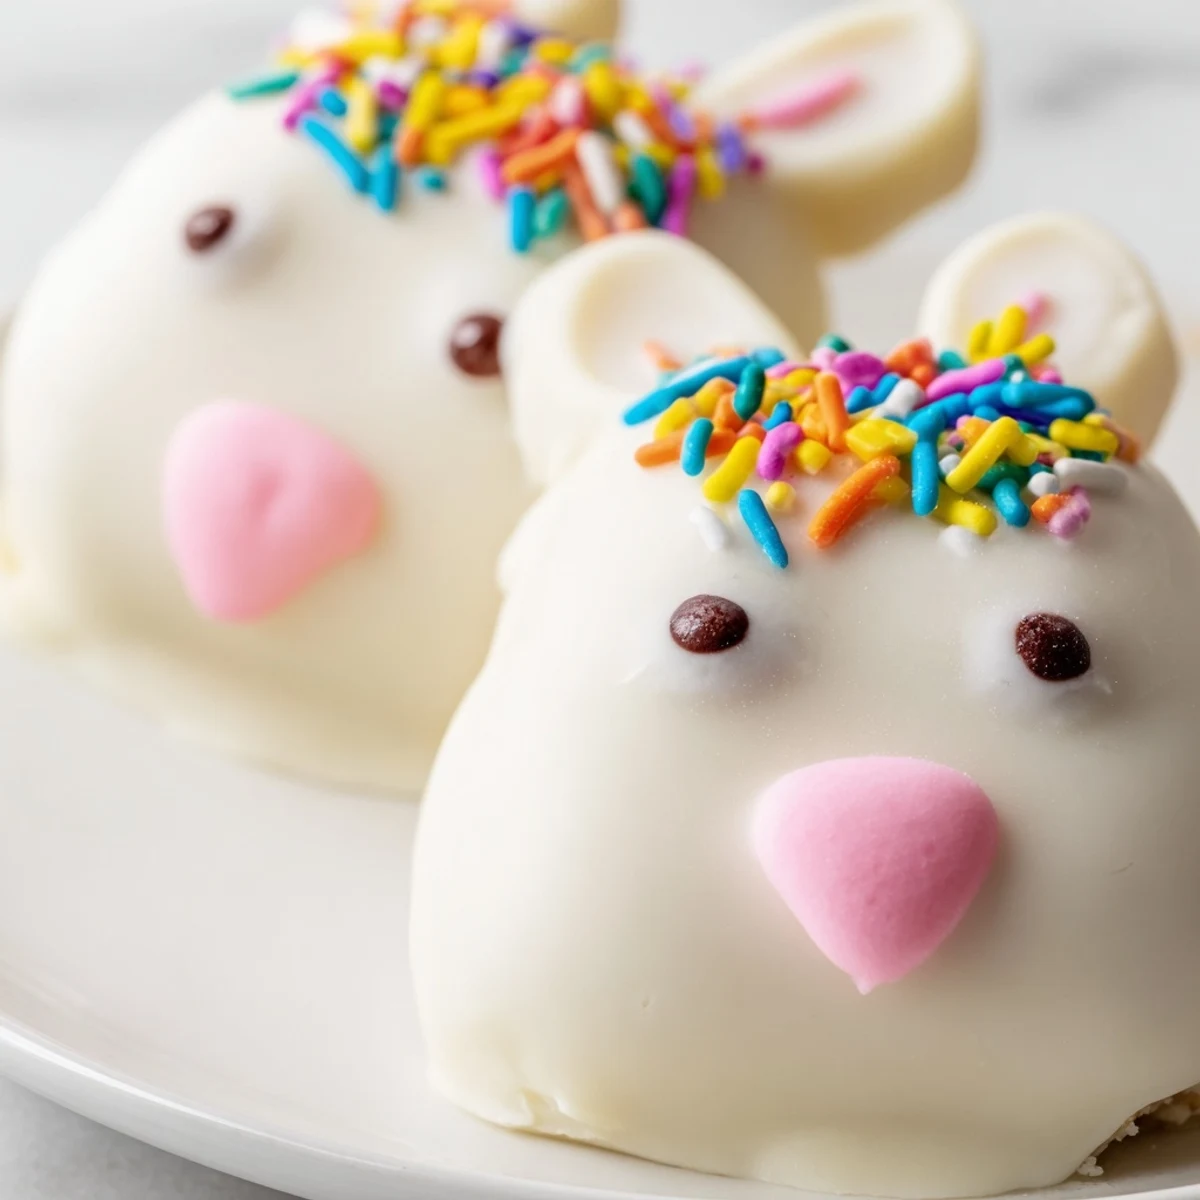
 These delightful bunny-shaped cakesicles combine moist vanilla cake with a rich white chocolate coating, creating the perfect handheld Easter treat. The cake mixture binds together with cream cheese and butter, then gets shaped into adorable bunny faces before being dipped in smooth white chocolate. Decorate with candy eyes, sprinkles, and colored details for a festive presentation that will delight both children and adults.
Last Easter, my kitchen looked like a confetti explosion. White chocolate streaked across my counters, sprinkles had escaped into corners I did not know existed, and eight little bunny faces stared back at me from the cooling rack. My daughter insisted we needed something more exciting than regular cupcakes for the family gathering. The cakesicles were an absolute hit with the kids, and honestly, the adults could not resist grabbing one too.
I made these again for a spring potluck at work and watched three colleagues immediately photograph them before eating. There is something about food on a stick that makes people genuinely happy, even the serious ones in accounting. Now they request them every year.
Ingredients
- Vanilla cake crumbs: The foundation of your cakesicle, use homemade or store bought cupcakes crumbled into fine pieces for the best texture
- Cream cheese: Acts as the binder that holds everything together while adding a subtle tang that cuts through the sweet coating
- Unsalted butter: Room temperature butter helps create that dough like consistency without making the mixture too soft
- Powdered sugar: Just enough to sweeten the filling without overwhelming the white chocolate coating
- Vanilla extract: Deepens the flavor profile and makes the cake taste freshly baked
- White chocolate: Choose high quality white chocolate melts for smooth melting and a rich creamy finish
- Edible gel food coloring: Perfect for adding pink noses, ears, or whiskers to bring your bunnies to life
- Cakesicle sticks: Essential for that playful lollipop appearance, insert them carefully to avoid breaking the shape
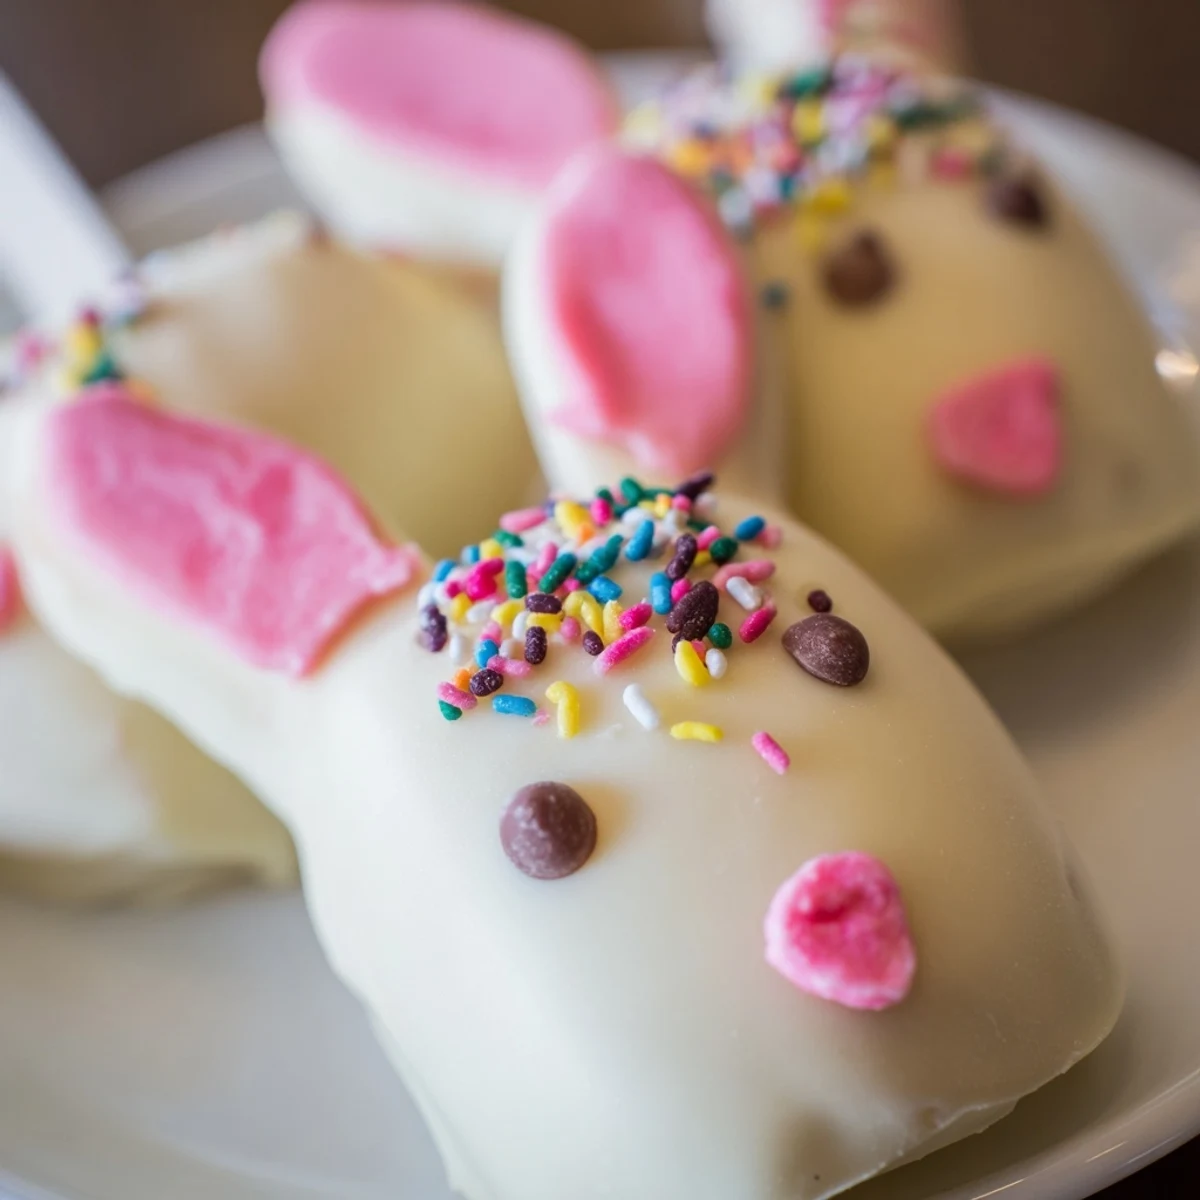
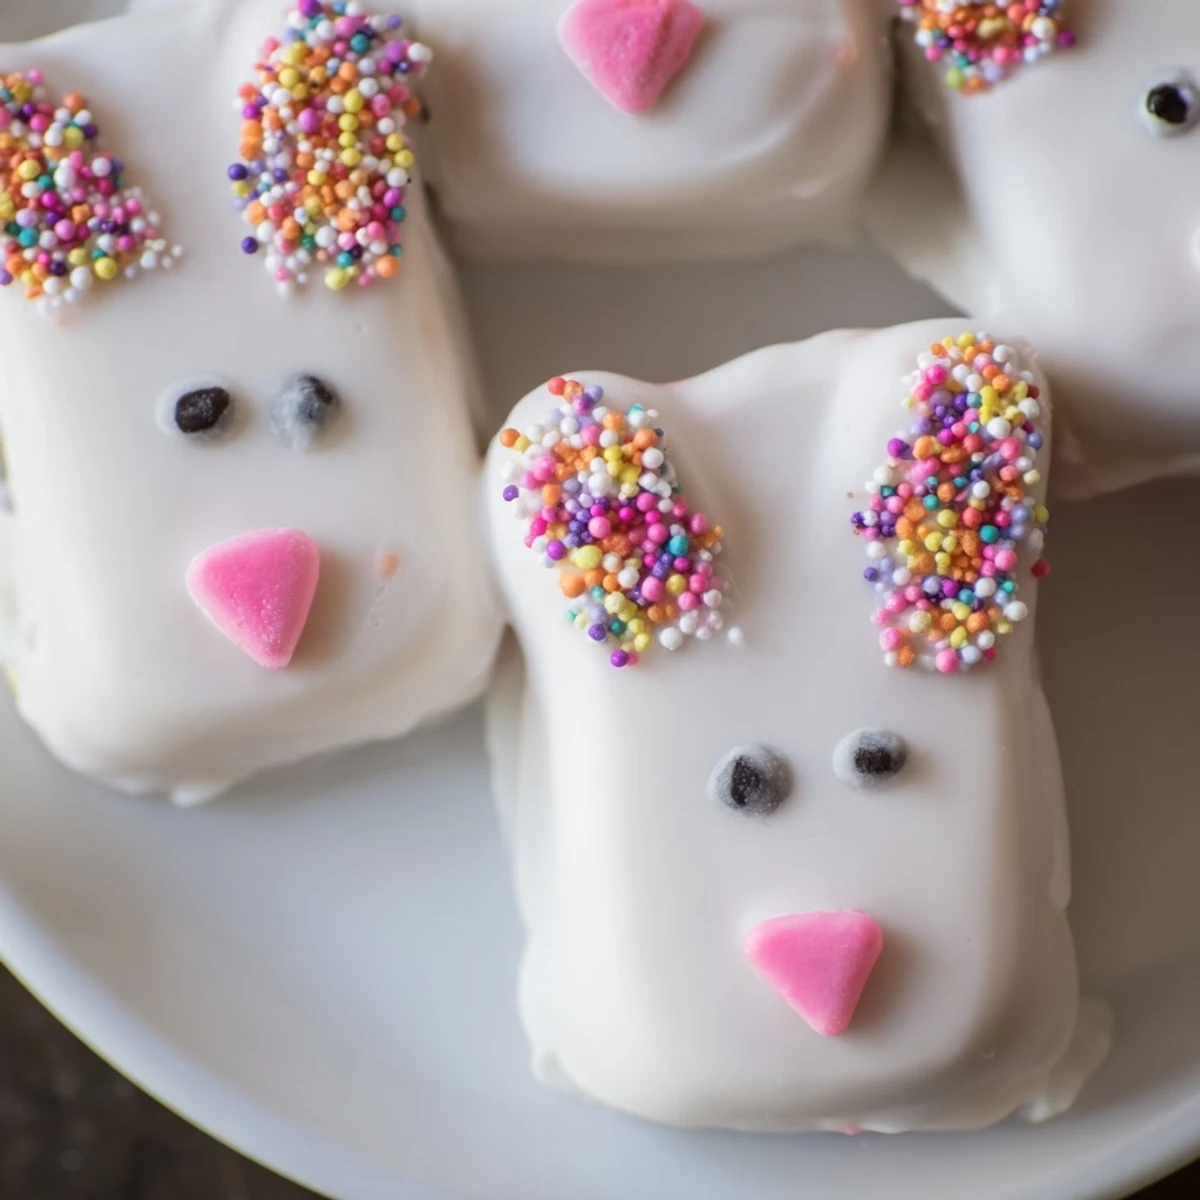
- Sprinkles and decorations: Candy eyes, fondant ears, and colorful sprinkles make each bunny unique and festive
Instructions
- Prepare the cake mixture:
- Combine cake crumbs, softened cream cheese, butter, powdered sugar, and vanilla in a medium bowl. Mix until you have a dough that holds together when squeezed.
- Shape your bunnies:
- Divide the mixture into 8 equal portions and gently flatten each into an oval shape with slightly pointed ears at the top.
- Add the sticks:
- Carefully insert a cakesicle stick into the bottom of each bunny shape, pressing gently to secure without breaking through the top.
- Chill until firm:
- Place the shaped cakesicles in the refrigerator for 20 to 30 minutes so they hold their shape during dipping.
- Melt the chocolate:
- Heat white chocolate in a microwave safe bowl in 30 second intervals, stirring between each until completely smooth and fluid.
- Dip and coat:
- Hold each cakesicle by the stick and dip into the melted chocolate, letting excess drip off before placing on parchment paper.
- Decorate immediately:
- While the coating is still soft, add candy eyes, sprinkle cheeks, and fondant ears before the chocolate sets.
- Set and serve:
- Let the cakesicles harden at room temperature or refrigerate briefly, then serve immediately or store in an airtight container.
 Save to Pinterest
 My nephew made the most hilarious lopsided bunny with three eyes and called it his abstract art masterpiece. It was the first one gone from the dessert table. Sometimes the imperfect ones become the most memorable.
Making Them Ahead
These cakesicles actually taste better after resting overnight in the fridge because the flavors meld together beautifully. The cake stays moist and the white chocolate coating maintains its shine when stored properly. Prepare them up to two days before your Easter celebration for stress free entertaining.
Fun Flavor Variations
Swap the vanilla cake crumbs for chocolate or lemon cake to completely change the profile. You can also fold crushed Oreos or sprinkles directly into the cake mixture before shaping. Some years I swirl pink food coloring into the white chocolate for a marbled bunny effect that looks stunning on the dessert table.
Decoration Ideas
Let your creativity run wild because no two bunnies need to look alike. Use pretzel sticks for ears, pipe pink frosting for noses, or draw whiskers with edible markers.
- Set up a decorating station and let guests customize their own cakesicle
- Keep melted white chocolate warm in a double boiler if working with a large batch
- Have extra sticks ready in case any break during assembly
 Save to Pinterest
 These bunny cakesicles bring such joy to Easter celebrations and they have become a tradition I look forward to every spring.
Recipe Questions
- → How far in advance can I make these cakesicles?
-
You can prepare the cake mixture and shape the bunnies up to 2 days ahead. Store them in the refrigerator, then dip and decorate the day you plan to serve them for the freshest appearance.
- → What's the best way to melt white chocolate without seizing?
-
Melt white chocolate in 30-second intervals at 50% power, stirring thoroughly between each burst. Avoid any contact with water or steam, as even a few drops can cause the chocolate to seize and become grainy.
- → Can I freeze these bunny cakesicles?
-
Yes! Once fully set, wrap individual cakesicles in plastic wrap and store in an airtight container in the freezer for up to 1 month. Thaw in the refrigerator overnight before serving.
- → What other cake flavors work well for this treat?
-
Chocolate cake creates a classic combination, while lemon or strawberry flavors add refreshing spring notes. Red velvet makes for dramatic contrast against the white coating. Just ensure your cake crumbs are fine for smooth shaping.
- → How do I prevent the sticks from falling out?
-
Refrigerate the shaped cake mixture for at least 20-30 minutes before inserting sticks to firm the texture. Insert about halfway into each cake pop, then dip the coated end slightly into melted chocolate before inserting for extra security.
- → What alternatives work for bunny decorations?
-
Fondant cutouts create clean ears and noses, while pink candy melts make adorable features. Pretzel sticks dipped in pink coating work for ears, and edible markers let you draw details directly onto the set white chocolate.
