 Save to Pinterest
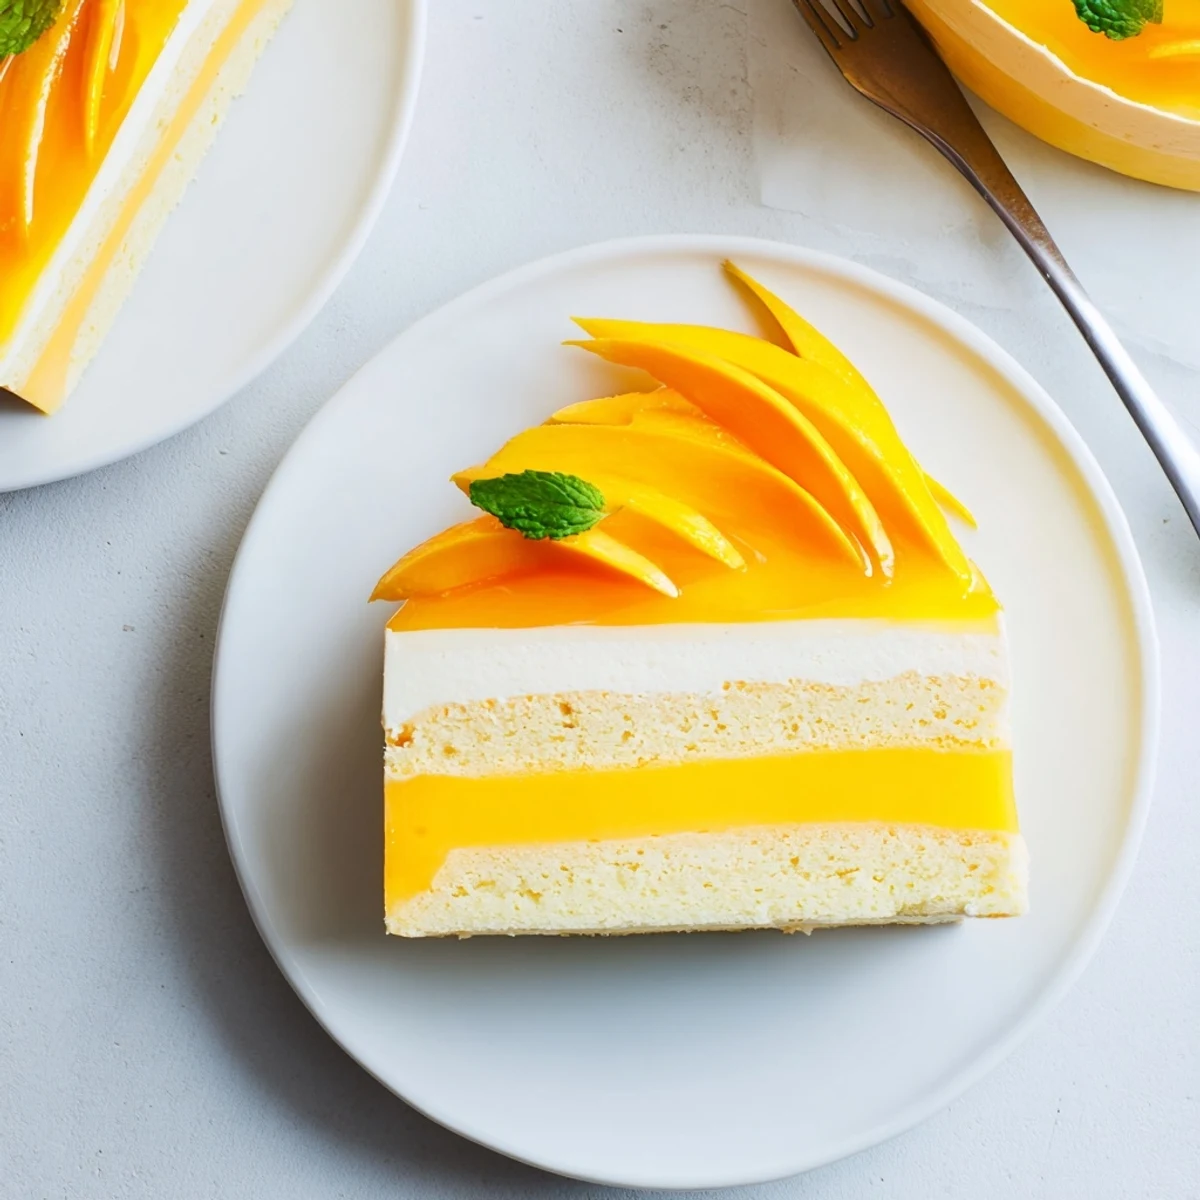
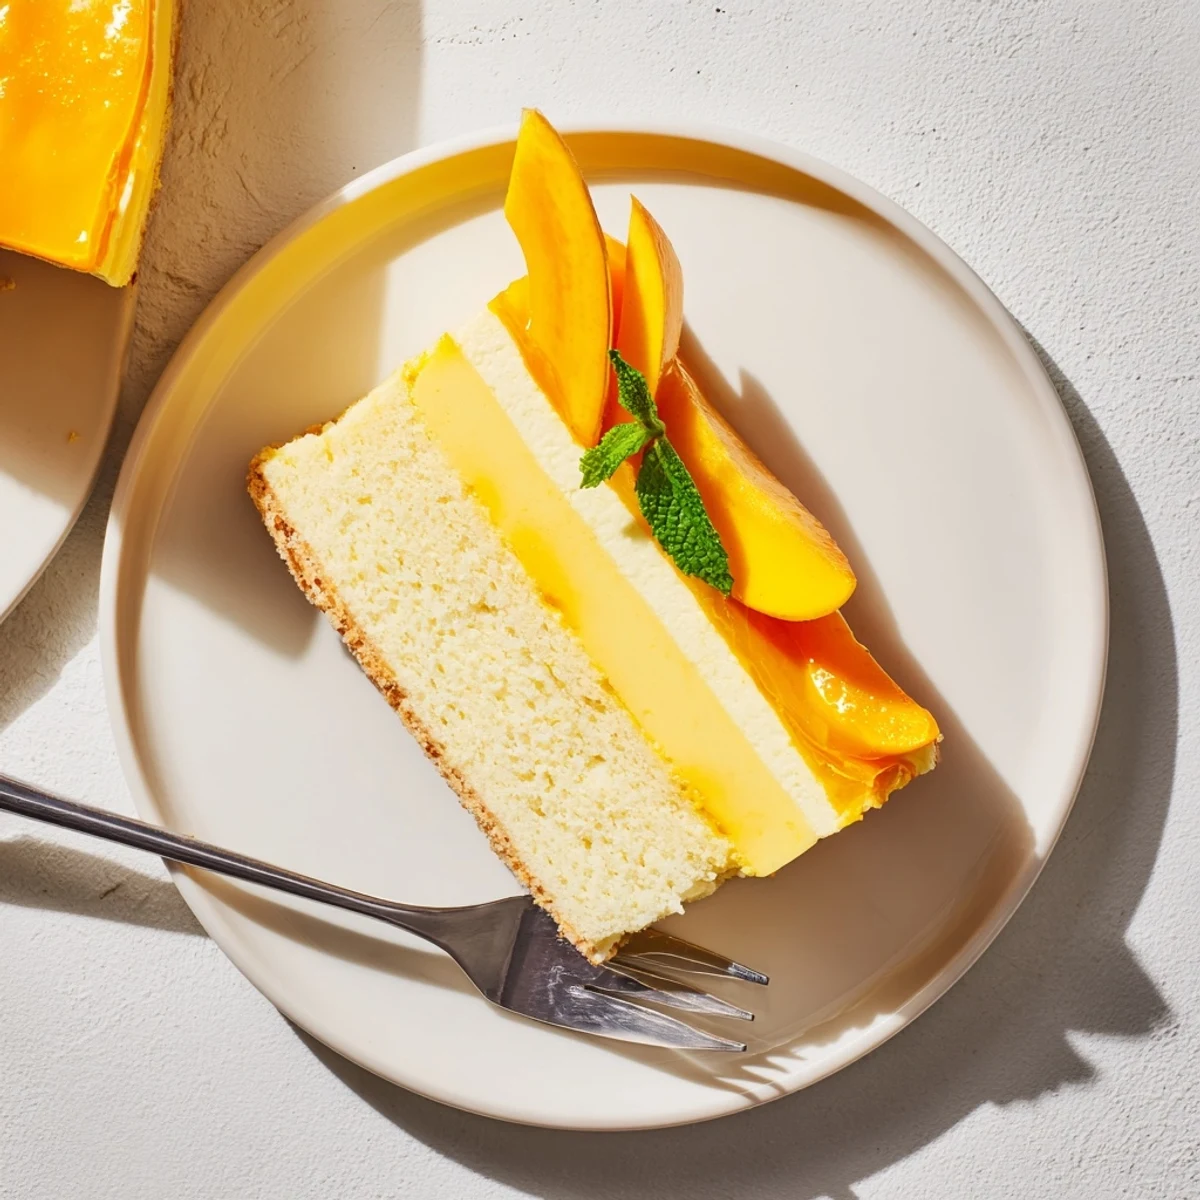
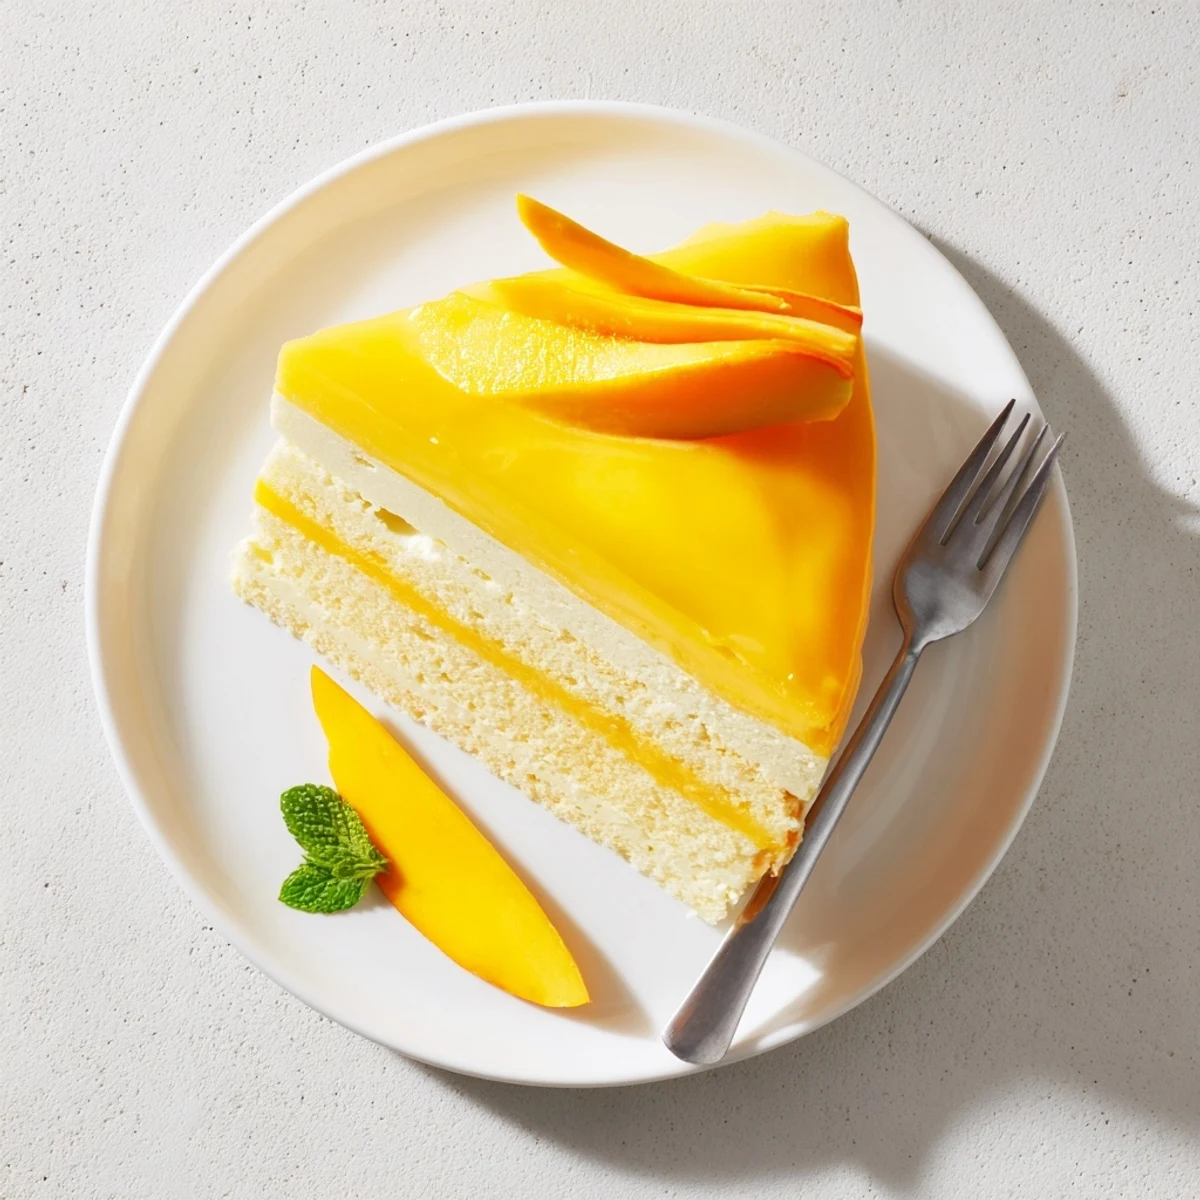
 This elegant dessert features three luxurious layers that create the perfect tropical finale for any celebration. The foundation starts with a tender vanilla sponge cake, baked until golden and light. Next comes the star—airy mango mousse made from fresh ripe mangoes whipped into heavy cream with a hint of lemon. The crowning glory is a mirror-like mango glaze that gives this stunning treat its professional finish. While the process requires some chilling time between layers, the result is absolutely worth the wait. Each slice delivers the perfect balance of sweet tropical fruit, creamy mousse, and delicate cake. The natural mango flavor shines through beautifully, making it an ideal choice for warm weather gatherings.
My aunt brought this cake to our July 4th gathering one sweltering afternoon, and I still remember how the entire room went quiet after the first bites. She'd spent the morning in her tiny kitchen, fan whirring against the heat, coaxing mangoes into something that felt like eating a cloud. The way the mousse practically dissolved on my tongue, that intense mango flavor followed by the tender sponge below, I knew I had to get that recipe before she left.
Last summer I made this for my best friend's birthday, and she honestly cried a little when she saw it. She's obsessed with mangoes, and I'd spent weeks hunting down perfectly ripe ones at different markets. The cake sat in my fridge taking up prime real estate for two days, and every time I opened the door, that glossy top caught the light and reminded me why patience in dessert making actually pays off.
Ingredients
- 3 large eggs at room temperature: Cold eggs wont whip up properly, so give them time on the counter before you start
- 90 g granulated sugar: This precise amount sweetens the sponge without making it crumbly or dense
- 90 g all-purpose flour: Sift it first to avoid any stubborn lumps in your delicate sponge
- 1/2 tsp vanilla extract: Pure extract makes a noticeable difference in such a simple base
- Pinch of salt: Just enough to wake up all the other flavors
- 400 g ripe mango flesh pureed: Taste your mangoes before starting because they carry the entire show
- 60 g granulated sugar: Adjust this depending on how sweet your mangoes are naturally
- 2 tbsp lemon juice: Brightens the mango flavor and helps balance the cream
- 1 tbsp unflavored gelatin powder: This is what gives the mousse that gorgeous hold without being rubbery
- 300 ml cold heavy cream: The colder it is, the better it whips up into those soft peaks you need
- 150 g mango puree: You can use some of the same batch from the mousse layer
- 1 tbsp lemon juice: Keeps the glaze from being cloyingly sweet
- 1 tbsp granulated sugar: Just enough to help the glaze set up shiny and smooth
- 1.5 tsp unflavored gelatin powder: A little less than the mousse layer since this is thinner
- Fresh mango slices and mint leaves: These arent just for looks, they tell people exactly what flavor to expect
Instructions
- Bake the sponge foundation:
- Preheat your oven to 180°C (350°F) and line the bottom of a 23 cm springform pan with parchment paper. Beat those room temperature eggs and sugar with an electric mixer for about 5 minutes until the mixture looks pale and has tripled in volume. Gently fold in the flour, salt, and vanilla until just combined, pour into your prepared pan, and bake for 12 to 15 minutes until a toothpick comes out clean. Let it cool completely right in the pan.
- Prepare the mango mousse base:
- Sprinkle your gelatin over 3 tablespoons of cold water and walk away for 5 minutes to let it bloom. Warm it gently until dissolved, being careful not to boil it, then blend your mango puree, sugar, and lemon juice until smooth. Stir that dissolved gelatin into the mango mixture, then whip your cold heavy cream to soft peaks and fold everything together until you have a silky, uniform mousse.
- Assemble the first layers:
- Pour that beautiful mousse over your completely cooled sponge, smoothing the top with an offset spatula or the back of a spoon. Pop it in the refrigerator for at least 2 hours until its set firm enough to hold the glaze layer.
- Create the glossy mango glaze:
- Bloom your gelatin in 2 tablespoons of cold water, then heat it gently until dissolved. Mix the mango puree, lemon juice, and sugar in a bowl, stir in the gelatin, and let it cool to room temperature. Pour it slowly over your set mousse layer, working from the center outward to avoid disturbing the surface.
- Finish and serve:
- Chill the whole cake for at least 2 more hours until the glaze is completely firm. Run a thin knife around the edge of the pan to release the cake, then unclasp the springform ring. Decorate with fresh mango slices and mint leaves if youre feeling fancy, then slice and serve this beauty chilled.
 Save to Pinterest
 My neighbor asked for the recipe after trying it at a dinner party, and when I described all the chilling time she looked skeptical. But then she made it for her anniversary and texted me saying she finally understood why some desserts are worth the wait and the refrigerator space.
Working With Gelatin
Ive learned that gelatin needs a gentle touch and proper blooming time to work its magic. Never let it boil or it loses its setting power completely, and always dissolve it fully before incorporating it into your mixtures.
Mango Selection Matters
The best mangoes for this cake yield slightly when you press them and smell fragrant at the stem. Underripe mangoes will give you a tart, fibrous puree, while overripe ones can make your mousse too loose to hold its shape properly.
Make Ahead Strategy
This cake actually improves after a day in the fridge, giving all those mango flavors time to deepen and marry together. You can make it up to 48 hours before serving, which makes it perfect for stress free entertaining.
- Wrap the springform pan tightly with plastic once the glaze is set to prevent fridge odors from absorbing
- Let the cake sit at room temperature for 10 minutes before releasing the springform for the cleanest edges
- Use a hot knife dipped in water between slices for restaurant worthy presentation
 Save to Pinterest
 Theres something deeply satisfying about slicing into this cake and seeing those perfect layers reveal themselves. Hope it becomes part of your summer celebration traditions too.
Recipe Questions
- → Can I use frozen mango for the mousse and glaze?
-
Yes, frozen mango chunks work perfectly when fresh mangoes aren't available. Thaw them completely and drain any excess liquid before pureeing. High-quality frozen mango actually produces excellent results since it's typically picked at peak ripeness and frozen immediately.
- → How long in advance can I make this cake?
-
You can prepare the entire cake up to 2 days in advance. It actually improves after chilling overnight as the flavors meld together. Store covered in the refrigerator, and add fresh decorations like mint leaves right before serving for the best presentation.
- → What can I substitute for gelatin to make this vegetarian?
-
The dessert already contains gelatin, which technically isn't vegetarian. For a vegetarian version, substitute with agar-agar powder using about half the specified amount. Dissolve it in boiling liquid before incorporating into your mango mixture. Note that the setting time may vary slightly.
- → Why did my mousse turn out runny?
-
Runny mousse usually means the heavy cream wasn't whipped to soft peaks, or the gelatin mixture was too hot when folded in, causing it to break down. Ensure your cream is very cold before whipping, and let the gelatin mixture cool to room temperature before combining. Also make sure to refrigerate for the full recommended time.
- → Can I make individual servings instead of one large cake?
-
Absolutely! You can use small glass cups, mason jars, or silicone molds to create individual portions. Layer the sponge pieces at the bottom, followed by mousse, then glaze. Individual servings set faster and look elegant served in clear glassware to show off the beautiful layers.
- → How do I know when the sponge base is fully baked?
-
The sponge is ready when it's golden brown on top, springs back lightly when touched, and a toothpick inserted in the center comes out clean or with just a few moist crumbs. Avoid overbaking as this can make the cake dry and difficult to work with when layering.
