 Save to Pinterest
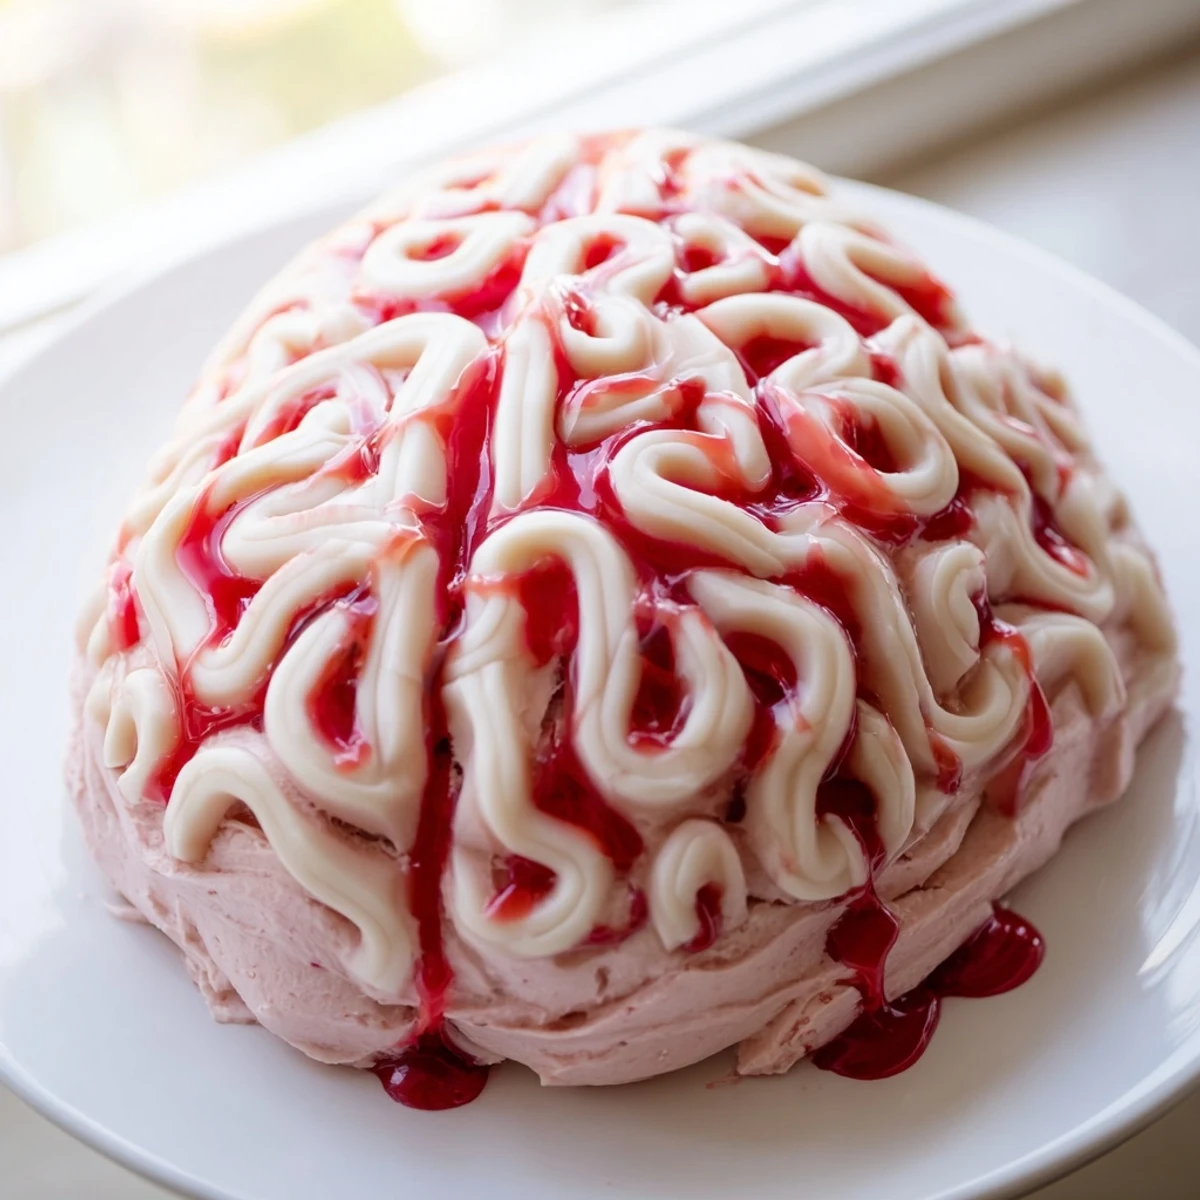
 This Halloween-inspired dessert combines creamy cheesecake with fresh strawberry purée in a brain-shaped mold. The graham cracker crust provides a buttery foundation, while the strawberry-infused filling delivers vibrant color and fruity sweetness. White chocolate piping creates realistic brain folds, with optional berry sauce for dramatic effect.
Preparation takes just 30 minutes before chilling for at least 5 hours. The vegetarian-adaptable dessert serves 10 people and works beautifully for themed celebrations. Simply blend fresh strawberries, combine with cream cheese mixture, and set in a brain mold. The white chocolate decoration adds the final creepy touch that makes this centerpiece unforgettable.
The first time I made this brain cheesecake, my roommate walked into the kitchen and actually screamed. I had just finished piping the white chocolate squiggles across the top, creating those eerie folded brain patterns, and the effect was unsettlingly realistic against the bright pink strawberry filling. Now it is become our Halloween tradition — the one dessert that makes everyone pause before they dig in, then rave about how incredible it tastes once they get over the presentation.
Last year I brought this to my friends annual horror movie marathon, and it sat on the table untouched for twenty minutes. People kept walking past it, doing a double take, and whispering is that actually a brain until I finally cut a slice and the strawberry scent hit them. Now they ask for it in July.
Ingredients
- 200 g graham crackers or digestive biscuits: The foundation needs to be crushed into fine, sandy crumbs — I pulse them in the food processor until no large chunks remain, which helps the crust hold together firmly when unmolded
- 75 g unsalted butter, melted: Use warm melted butter and press the crust mixture firmly into the mold base with the back of a spoon — this step cannot be rushed or you will end up with a crumbly mess later
- 400 g fresh strawberries, hulled: Peak season strawberries make all the difference here, but frozen ones work in a pinch — just thaw them completely and drain any excess liquid before blending
- 2 tbsp granulated sugar: Adjust this slightly based on your strawberries natural sweetness — I have learned that underripe berries need the full amount while ripe ones can sometimes get away with less
- 2 tbsp water: This small amount creates the gelatin bloom that gives the strawberry layer structure, and using lukewarm water helps the gelatin dissolve evenly without clumping
- 2 tsp gelatin powder: Sprinkle this slowly over the water surface rather than dumping it in — letting it bloom for the full five minutes prevents grainy spots in your finished cheesecake
- 400 g cream cheese, room temperature: I always take mine out two hours ahead because cold cream cheese creates those frustrating tiny lumps that no amount of mixing can fix
- 100 g powdered sugar: The cornstarch in powdered sugar helps stabilize the filling, and sifting it beforehand prevents those dreaded white specks in your perfectly pink cheesecake
- 200 ml heavy cream: Chill your mixing bowl and whisk in the freezer for ten minutes before whipping — this small step makes the difference between soft peaks that collapse and peaks that hold their shape
- 1 tsp vanilla extract: Use pure vanilla extract rather than imitation — the warm floral notes round out the bright strawberry flavor and make the filling taste more complex
- 200 g white chocolate, melted: Chop the chocolate into uniform pieces before melting for even heating, and avoid overheating — white chocolate seizes quickly and becomes grainy if it gets too hot
- Pink gel food coloring: Start with a tiny amount on a toothpick — gel coloring is incredibly concentrated, and you can always add more but you cannot take it back
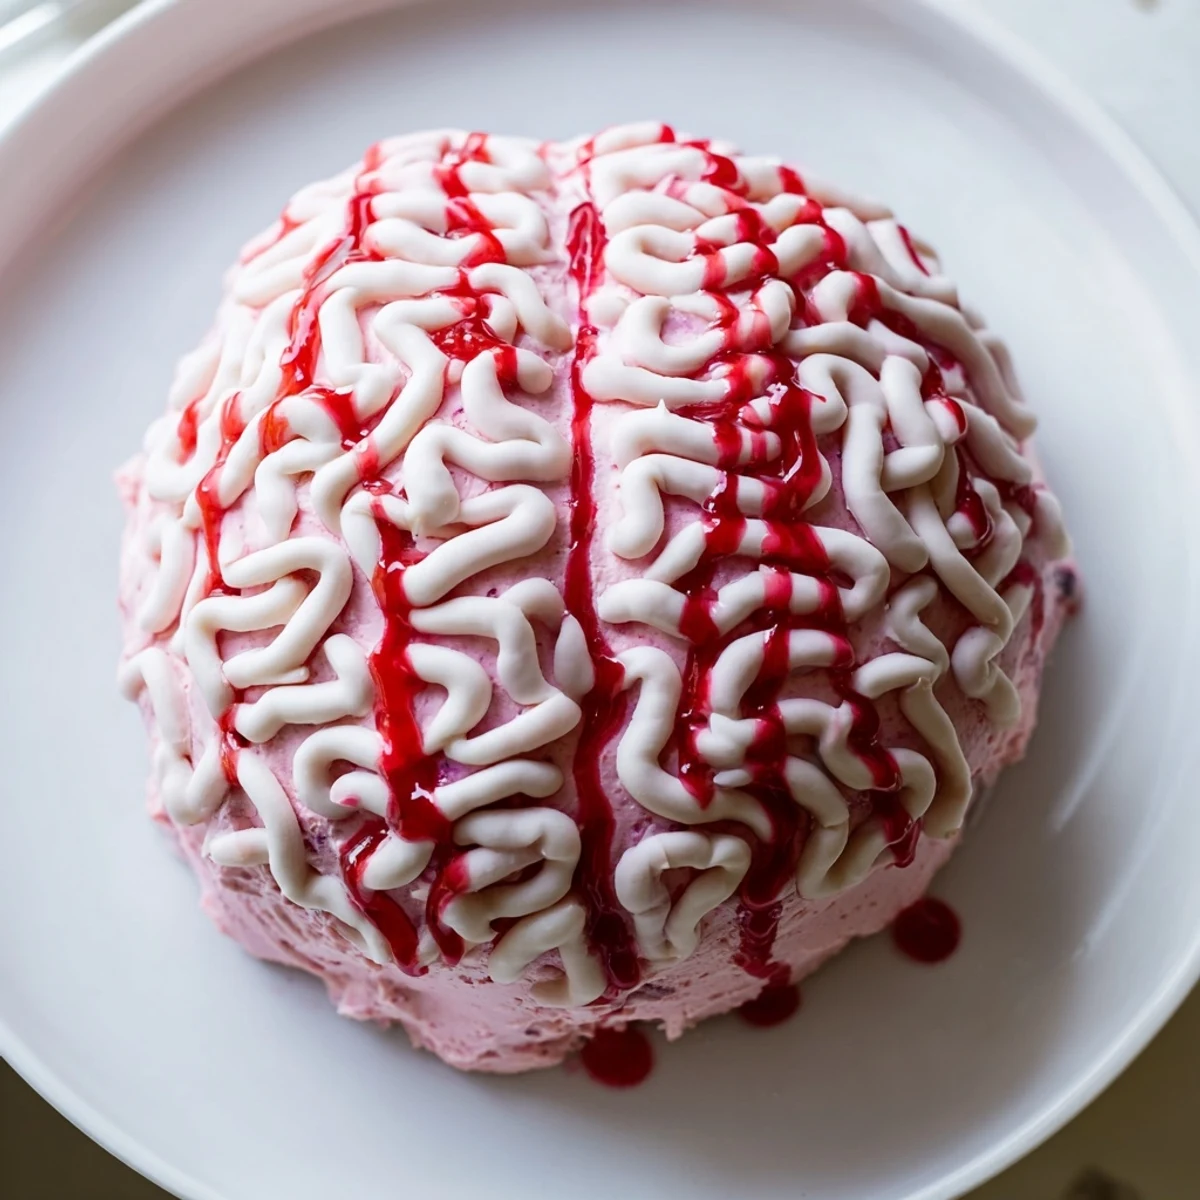
- Extra strawberry coulis or red berry sauce: This creates the bloody effect that pushes the brain theme over the top — drizzle it sparingly so it looks like realistic veining rather than a messy puddle
Instructions
- Prepare your mold:
- Line a brain-shaped silicone mold with plastic wrap if you want extra insurance for clean removal, though the silicone alone usually works beautifully. If you are using a regular bowl, line it thoroughly with overlapping pieces of plastic wrap, leaving plenty of overhang to help lift the cheesecake out later.
- Make the crust:
- Crush the graham crackers until they resemble fine sand, then stir in the melted butter until every crumb is coated and the mixture holds together when squeezed. Press this firmly into the bottom of your mold, creating an even layer, then refrigerate while you prepare the filling.
- Prepare the strawberry layer:
- Blend the hulled strawberries with granulated sugar until completely smooth, then strain out any seeds if you want a perfectly smooth texture. Sprinkle the gelatin over water in a small bowl, let it bloom for five minutes until it looks like wrinkled discs, then warm it gently until dissolved before stirring it into the strawberry puree.
- Make the cheesecake filling:
- Beat the cream cheese and powdered sugar until completely smooth and no lumps remain — scrape down the sides of the bowl to catch any pockets of cream cheese that like to hide. In a separate chilled bowl, whip the heavy cream to soft peaks that droop slightly when you lift the whisk, then gently fold it into the cream cheese mixture along with the vanilla.
- Combine and fill:
- Pour the cooled strawberry gelatin mixture into the cheesecake filling and fold gently until uniformly pink — a few streaks are okay but avoid overmixing or you will deflate the air you just whipped in. Pour this over your prepared crust, smooth the top with an offset spatula, and refrigerate for at least five hours or overnight until completely set.
- Create the brain decoration:
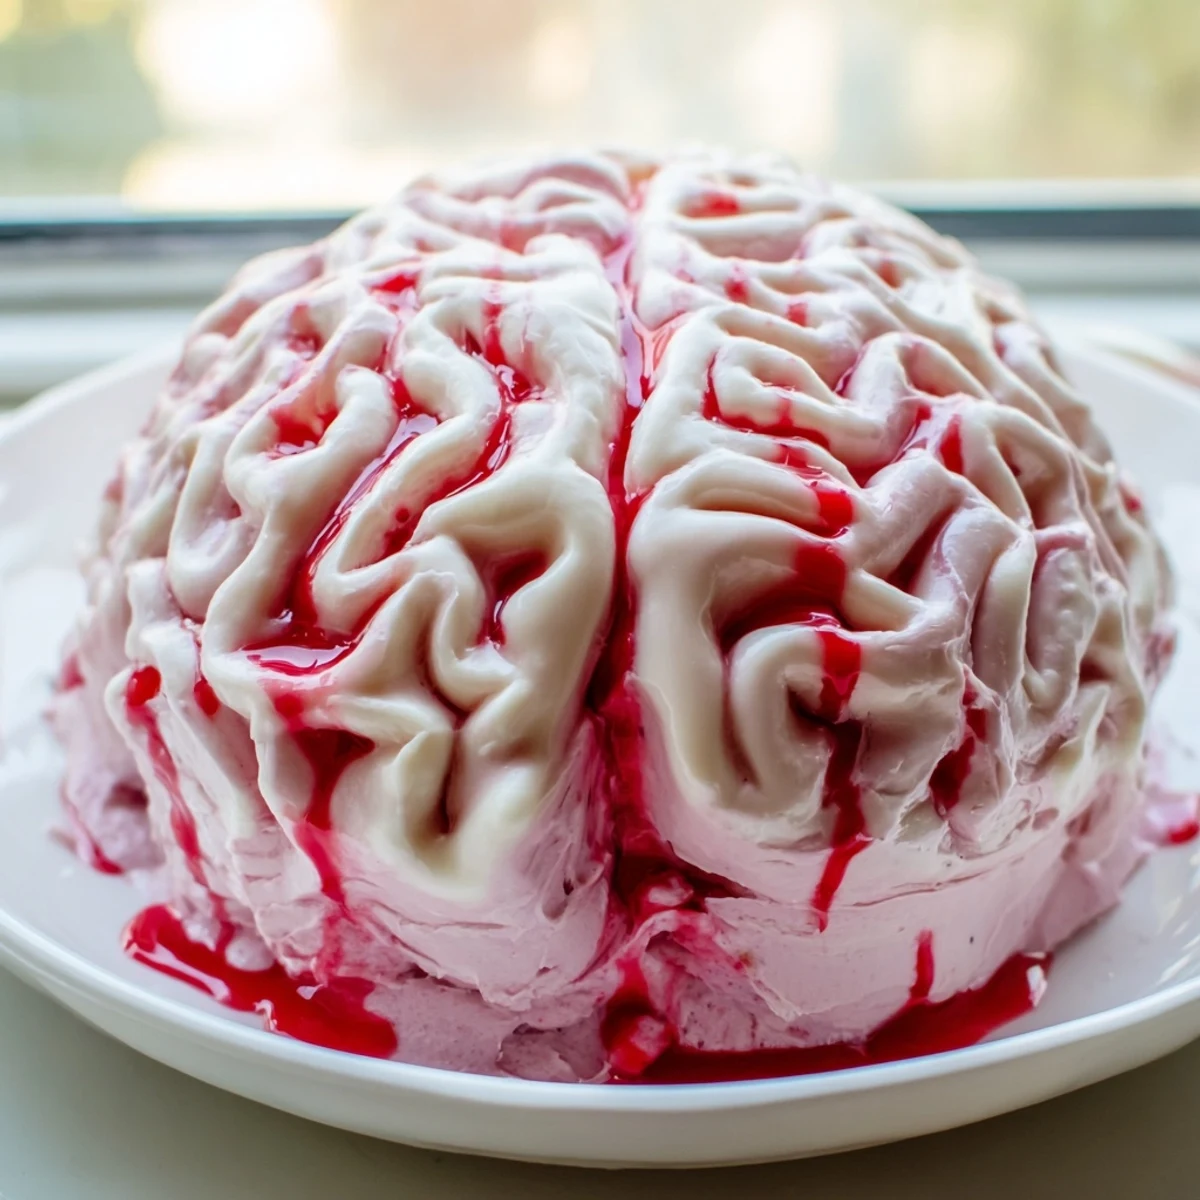
- Melt the white chocolate carefully, stirring until completely smooth, then tint it with pink gel coloring until you reach a fleshy brain-like color. Transfer to a piping bag and pipe squiggly lines onto parchment paper — these should look random and organic, not perfect — then chill until firm.
- Assemble and serve:
- Carefully unmold your cheesecake by gently pulling the plastic wrap or pressing the silicone mold from the bottom. Arrange the white chocolate squiggles across the surface to resemble brain folds, then drizzle with strawberry coulis in a veining pattern for that freshly dissected effect.
 Save to Pinterest
 My niece originally helped me pipe the white chocolate patterns, and her artistic interpretation was so creative that now I let her design the brain every year. It has become this sweet tradition where she studies brain pictures beforehand and plans her squiggle strategy like a mini scientist.
Making It Ahead
The cheesecake itself can be prepared two days in advance and stored tightly wrapped in the refrigerator, which actually helps the flavors develop and meld together. However, add the white chocolate decoration no more than 24 hours before serving, as the chocolate can occasionally develop condensation spots or lose its crisp texture over time.
Alternative Molds
If you cannot find a brain mold, a simple dome shape works beautifully and you can create the brain effect entirely with the white chocolate piping on top. I have even used a regular round cake pan and painted the brain pattern directly onto the surface, which almost looks like a crosssection view in a medical textbook.
Storage And Serving
Leftovers keep remarkably well in an airtight container for up to four days, though the crust may soften slightly as it sits in the refrigerator. For the best presentation, slice the cheesecake while it is thoroughly chilled and serve it immediately on individual plates — the cleaner the slice, the more impressive the brain texture appears.
- Run your knife under hot water and wipe it dry between slices for those pristine clean cuts that show off the layers
- Serve with extra strawberry sauce on the side so guests can control how bloody they want their slice
- Consider making a half batch of the white chocolate squiggles as decoration — you will likely have more than you need and the extras make fantastic garnishes for other desserts
 Save to Pinterest
 There is something deeply satisfying about serving a dessert that makes people gasp, then watching their expressions shift from horrified to delighted after that first creamy strawberry bite. This brain cheesecake has officially become the one Halloween treat my friends actually request instead of candy.
Recipe Questions
- → Can I make this ahead of time?
-
Absolutely. This actually benefits from being made 1-2 days in advance. The flavors develop beautifully during chilling. Complete all steps except the white chocolate decoration, wrap tightly, and decorate just before serving.
- → What if I don't have a brain mold?
-
Use a medium oval bowl lined with plastic wrap. The shape will still resemble a brain when unmolded. Alternatively, use any decorative mold and create brain-like patterns with the white chocolate piping on top.
- → Can I use frozen strawberries?
-
Yes, thaw and drain frozen strawberries before blending. You may need to reduce the added sugar slightly since frozen berries can be sweeter. The texture works equally well in the purée layer.
- → How long does this keep in the refrigerator?
-
Properly covered, this keeps for 3-4 days refrigerated. The texture remains creamy and the crust stays crisp. However, the white chocolate decoration may develop condensation, so add fresh piping before serving if storing longer than 24 hours.
- → Can I freeze this cheesecake?
-
You can freeze the cheesecake portion (without white chocolate decoration) for up to 1 month. Wrap tightly in plastic and foil. Thaw overnight in the refrigerator before decorating and serving. The texture remains nearly identical after freezing.
- → What's the best way to achieve the brain texture?
-
Melt white chocolate until smooth and transfer to a piping bag or zip-top bag with a small hole cut. Pipe squiggly lines and loops on parchment paper, varying the direction and size. Chill until firm, then carefully place on the chilled cheesecake surface.
